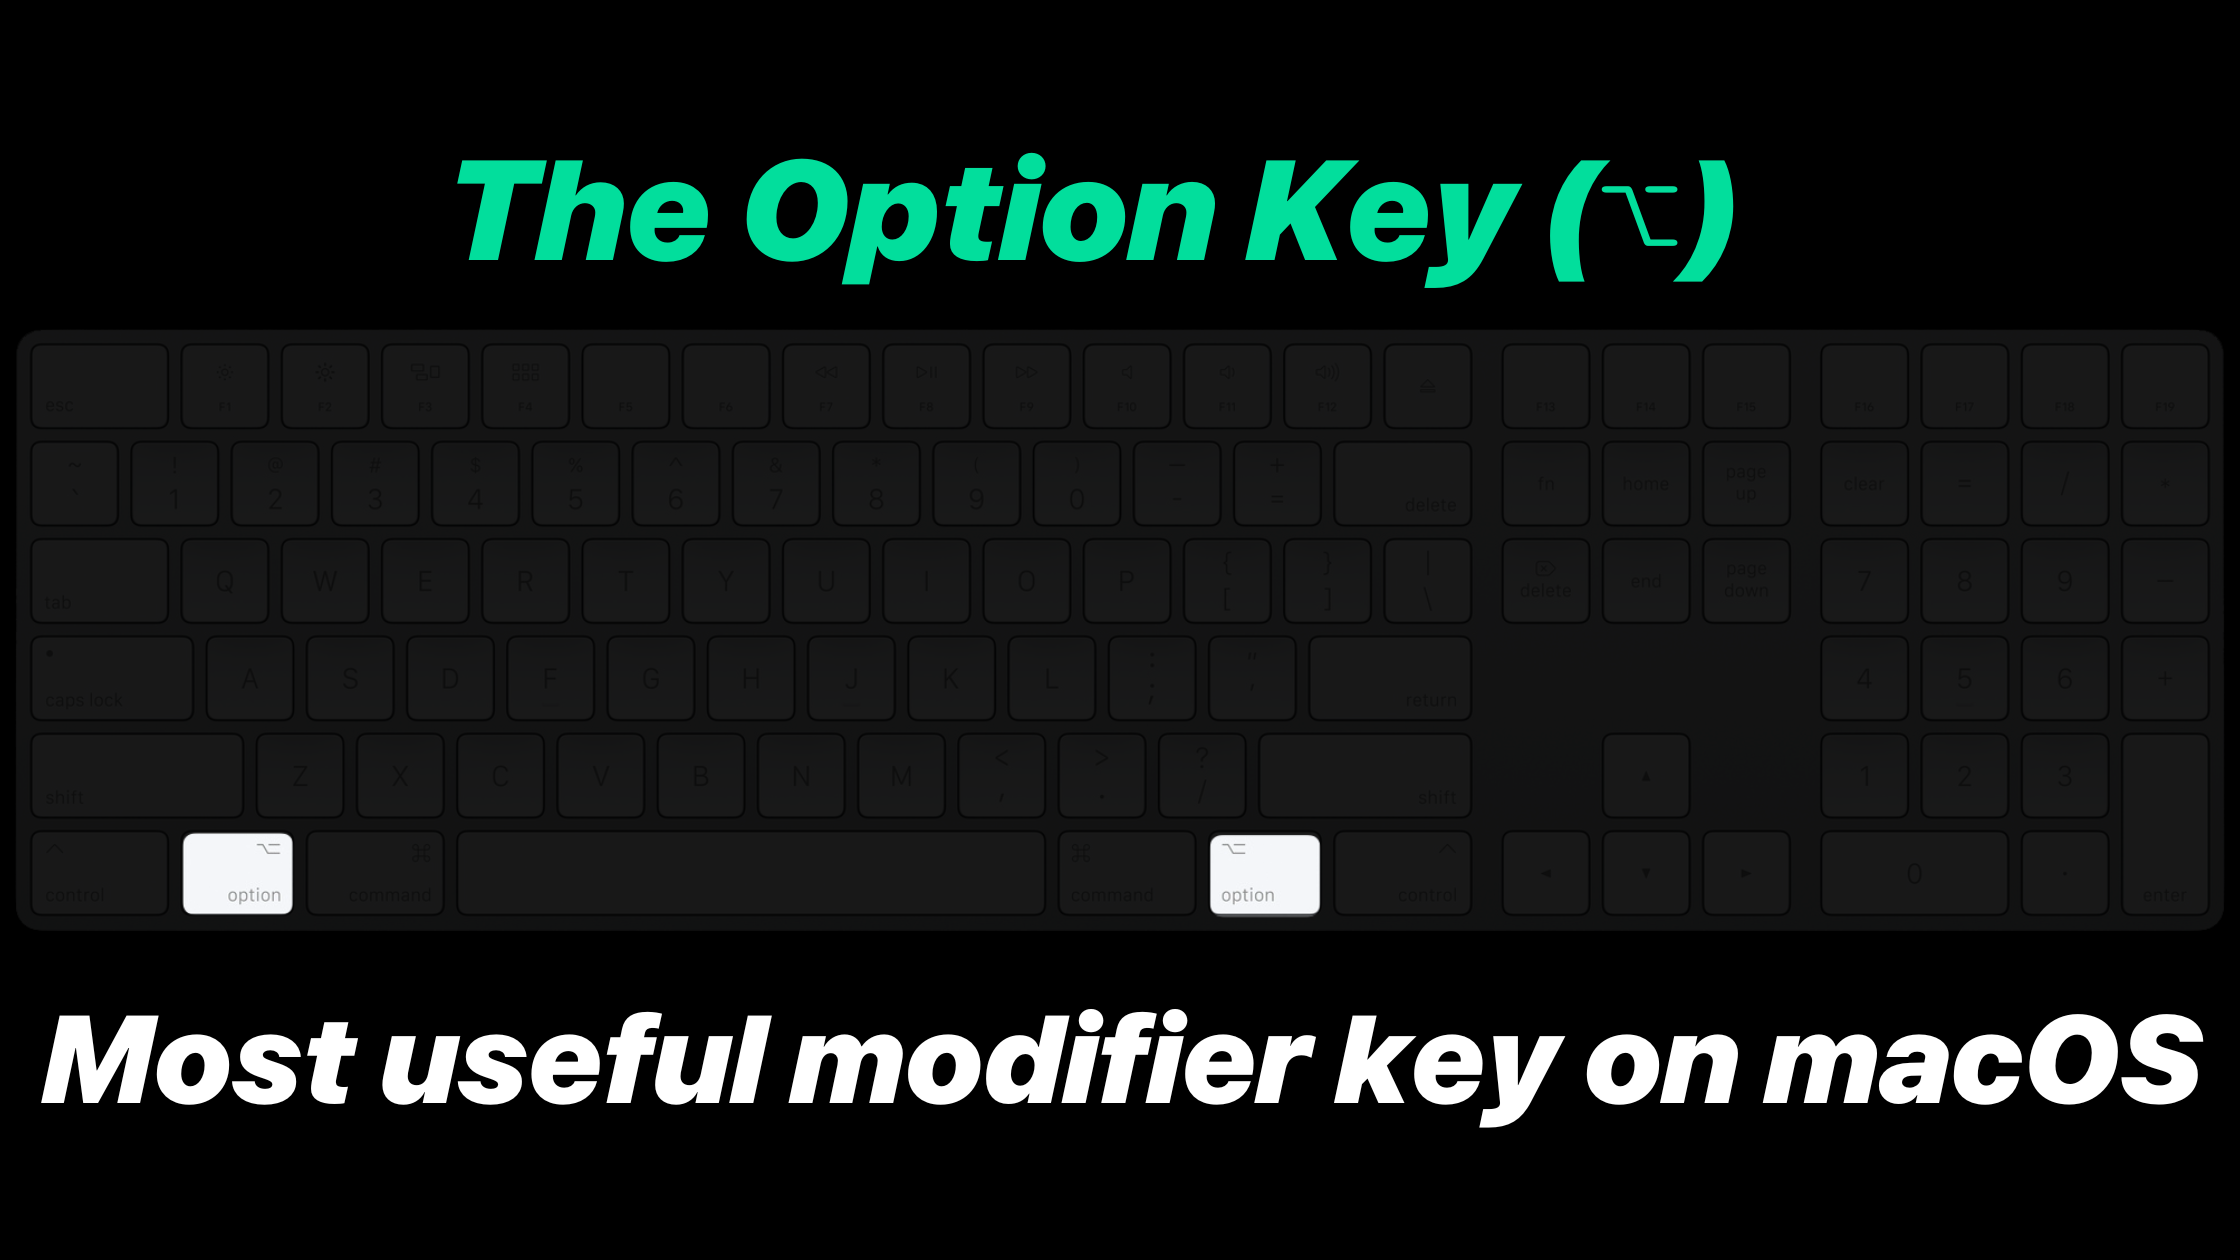
If you own a Mac, you’d know that macOS doesn’t have an ‘alt’ key, like Windows OS does.
It’s the option (⌥) key on your macOS. It’s more than just a key; it’s home to several settings and shortcuts you should know.
If you’re a control freak and love macOS, this post is for you. Here, you’ll learn everything you can do with the cute little Optio (⌥) key.
The Option Key: A Powerful macOS Modifier Key
The Option key (⌥) is far more than just a simple alternative to the Windows Alt key.
It’s a versatile modifier that unlocks hidden features, shortcuts, and functionalities across macOS, transforming how users interact with their Mac computers.
Key Locations and Identification
On modern Mac keyboards, you’ll find two Option keys

- Located on both sides of the spacebar
- Often labeled with the ⌥ symbol
- Sometimes marked as “Alt” on older keyboard models
Fundamental Functions of the Option Key (⌥)
#1 Menu Modifications
The Option key (⌥) dynamically changes menu items and reveals alternative actions when pressed.
For instance,
- In Finder, “Close Window” transforms to “Close All Windows”
- Context menus gain additional options like “Hide Others” and “Force Quit”
- Menu bar system icons display extensive information when Option-clicked
#2 Special Character Input Using Option key (⌥) on macOS
The Option key (⌥) enables typing special characters and symbols:
- Option + 1 generates ¡
- Option + 2 generates ™
- Option + 4 generates ¢
- Option + 5 generates ∞
- Option + 6 generates §
- Option + 7 generates ¶
- Option + 8 generates •
- Option + 9 generates ª
- Option + 0 generates º
- Option + A generates å
- Option + B generates ∫
- Option + C generates ç
- Option + D generates ∂
- Option + E generates ´
- Option + F generates ƒ
- Option + G generates ©
- Option + H generates ˙
- Option + I generates ˆ
- Option + J generates ∆
- Option + K generates ˚
- Option + L generates ¬
- Option + M generates µ
- Option + N generates ˜ [This is different from Shift + ~]
- Option + O generates ø
- Option + P is empty (you can assign any custom shortcut for this combination)
- Option + Q generates œ
- Option + R generates ®
- Option + S generates ß
- Option + T generates †
- Option + U generates ¨
- Option + V generates √
- Option + W generates ∑
- Option + X generates ≈
- Option + Y generates ¥
- Option + Z generates Ω
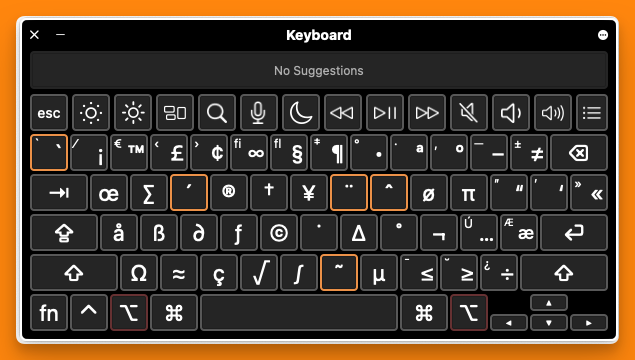
This list is too long to remember. You can have these characters handy and visible in just two clicks.
Here’s how to do this:
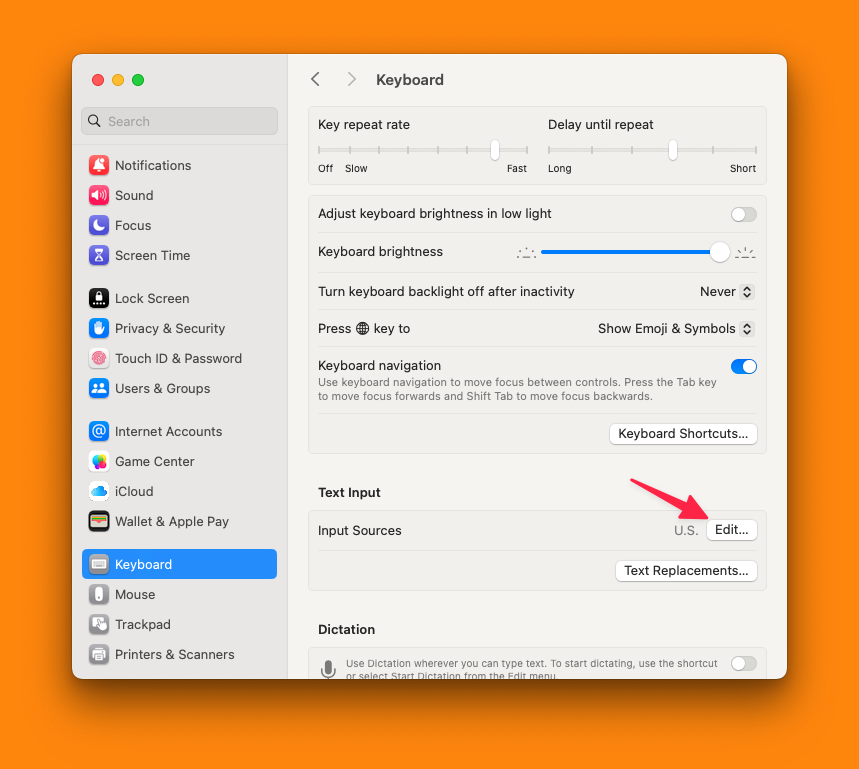
Open System Settings > Keyboard and select Edit under “Input Text”
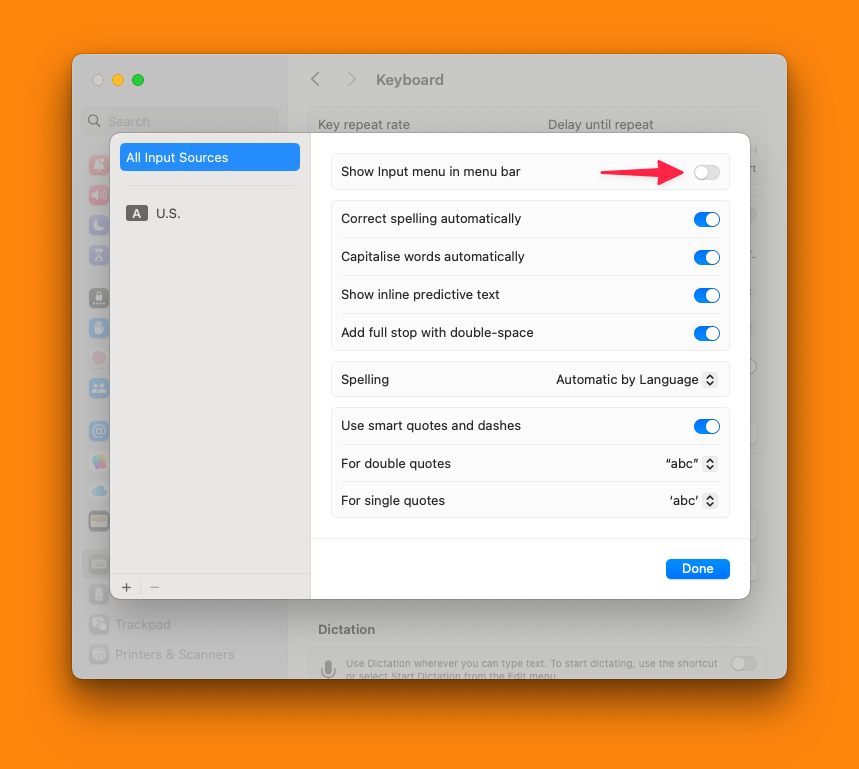
In the next window, toggle on “Show Input Menu in Menu bar“
You will see the Keyboard input option in the menu bar. Click on the input option and then click on “Show Keyboard Viewer“

An on-screen keyboard will be shown. Hold the Option key (⌥) to highlight special characters you should type to enter the special character as input.
#3 File and Window Management
Several powerful file manipulation shortcuts exist
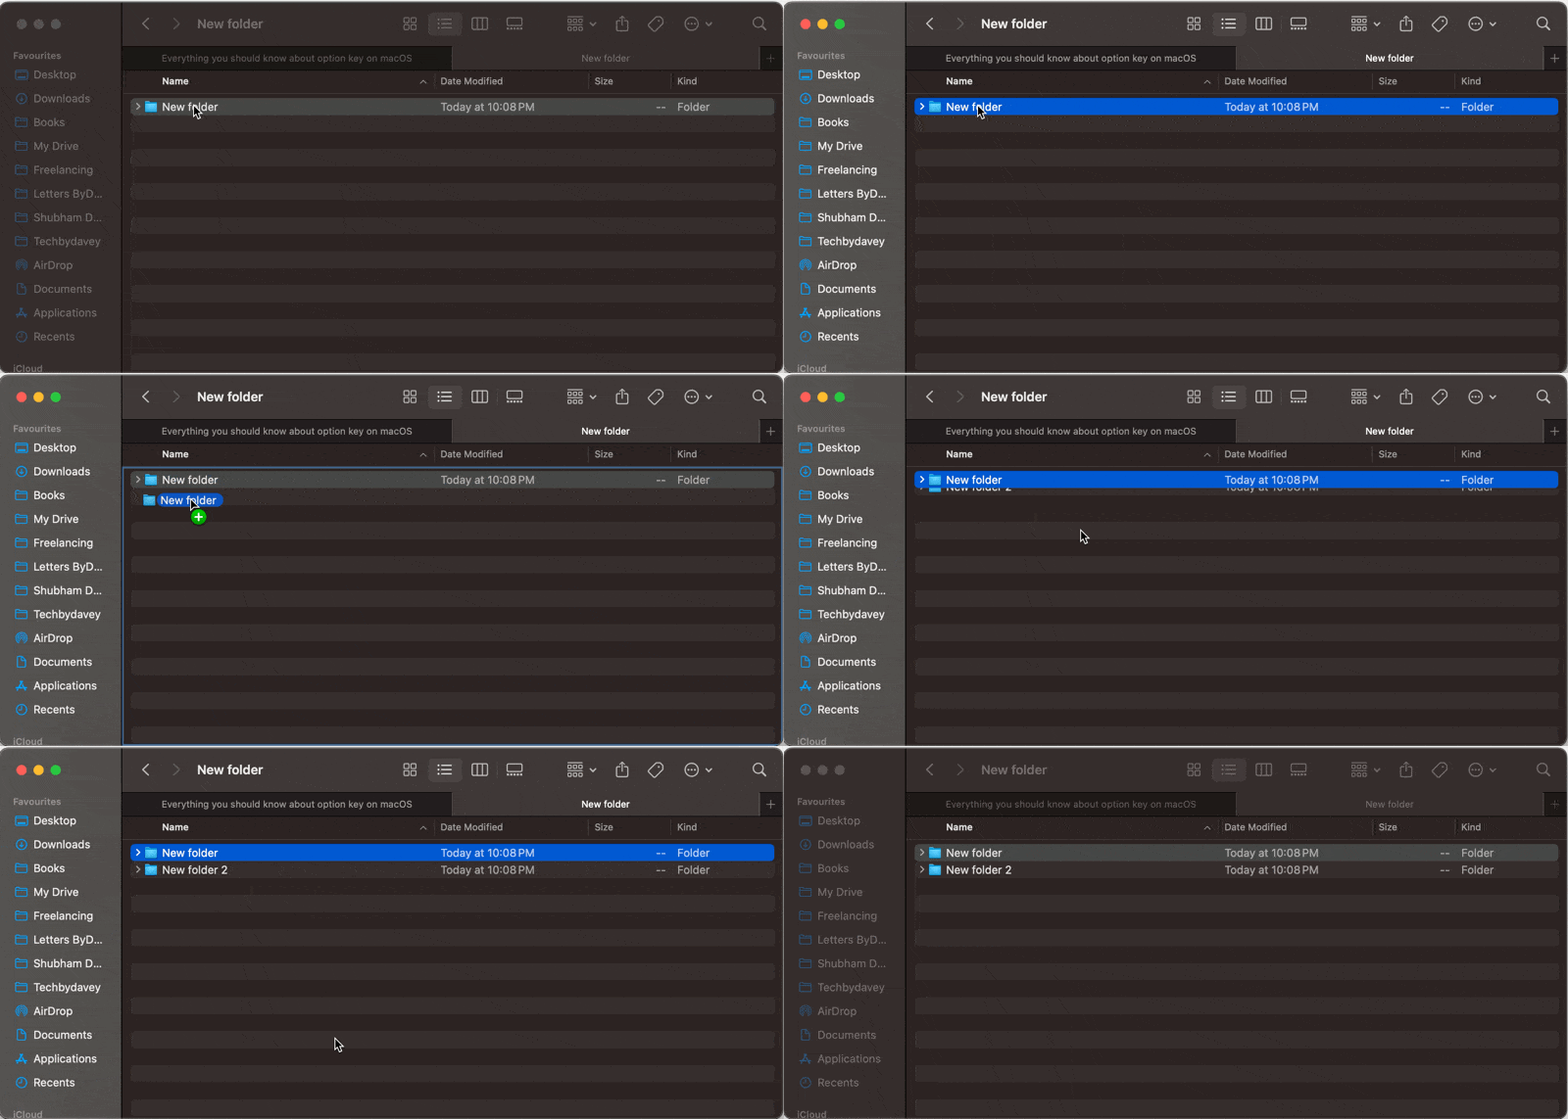
#3.1 Option-drag files create instant copies
#3.2 Option-click close button closes all windows in an application
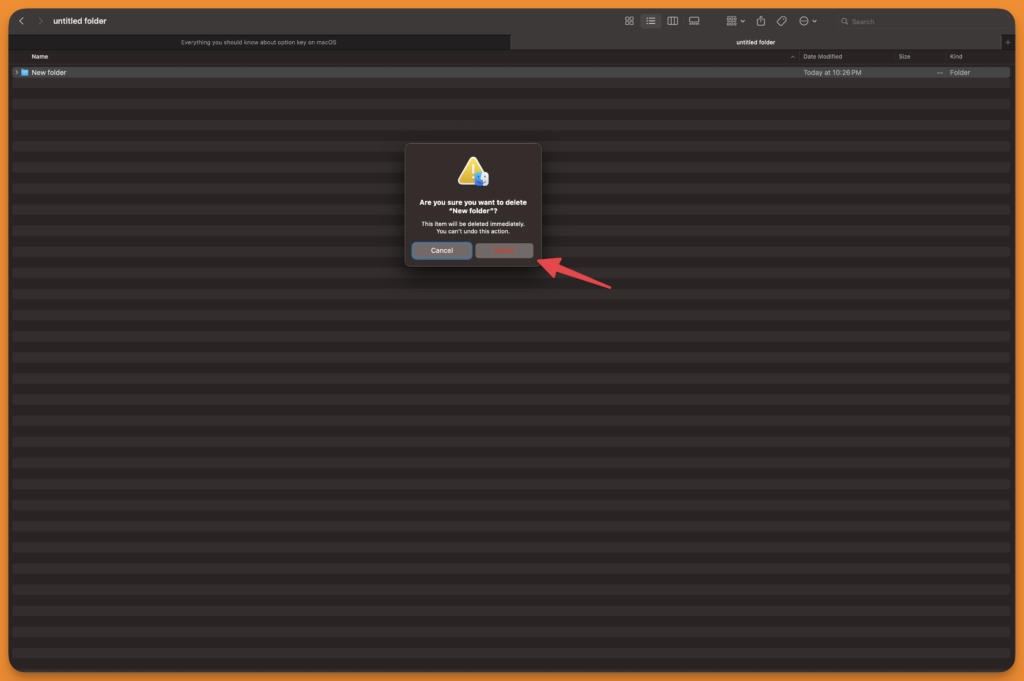
#3.3 Option + Command + Backspace immediately deletes selected files

This way, the selected file/folder will be deleted permanently, skipping the trash bin. You will see the following popup.
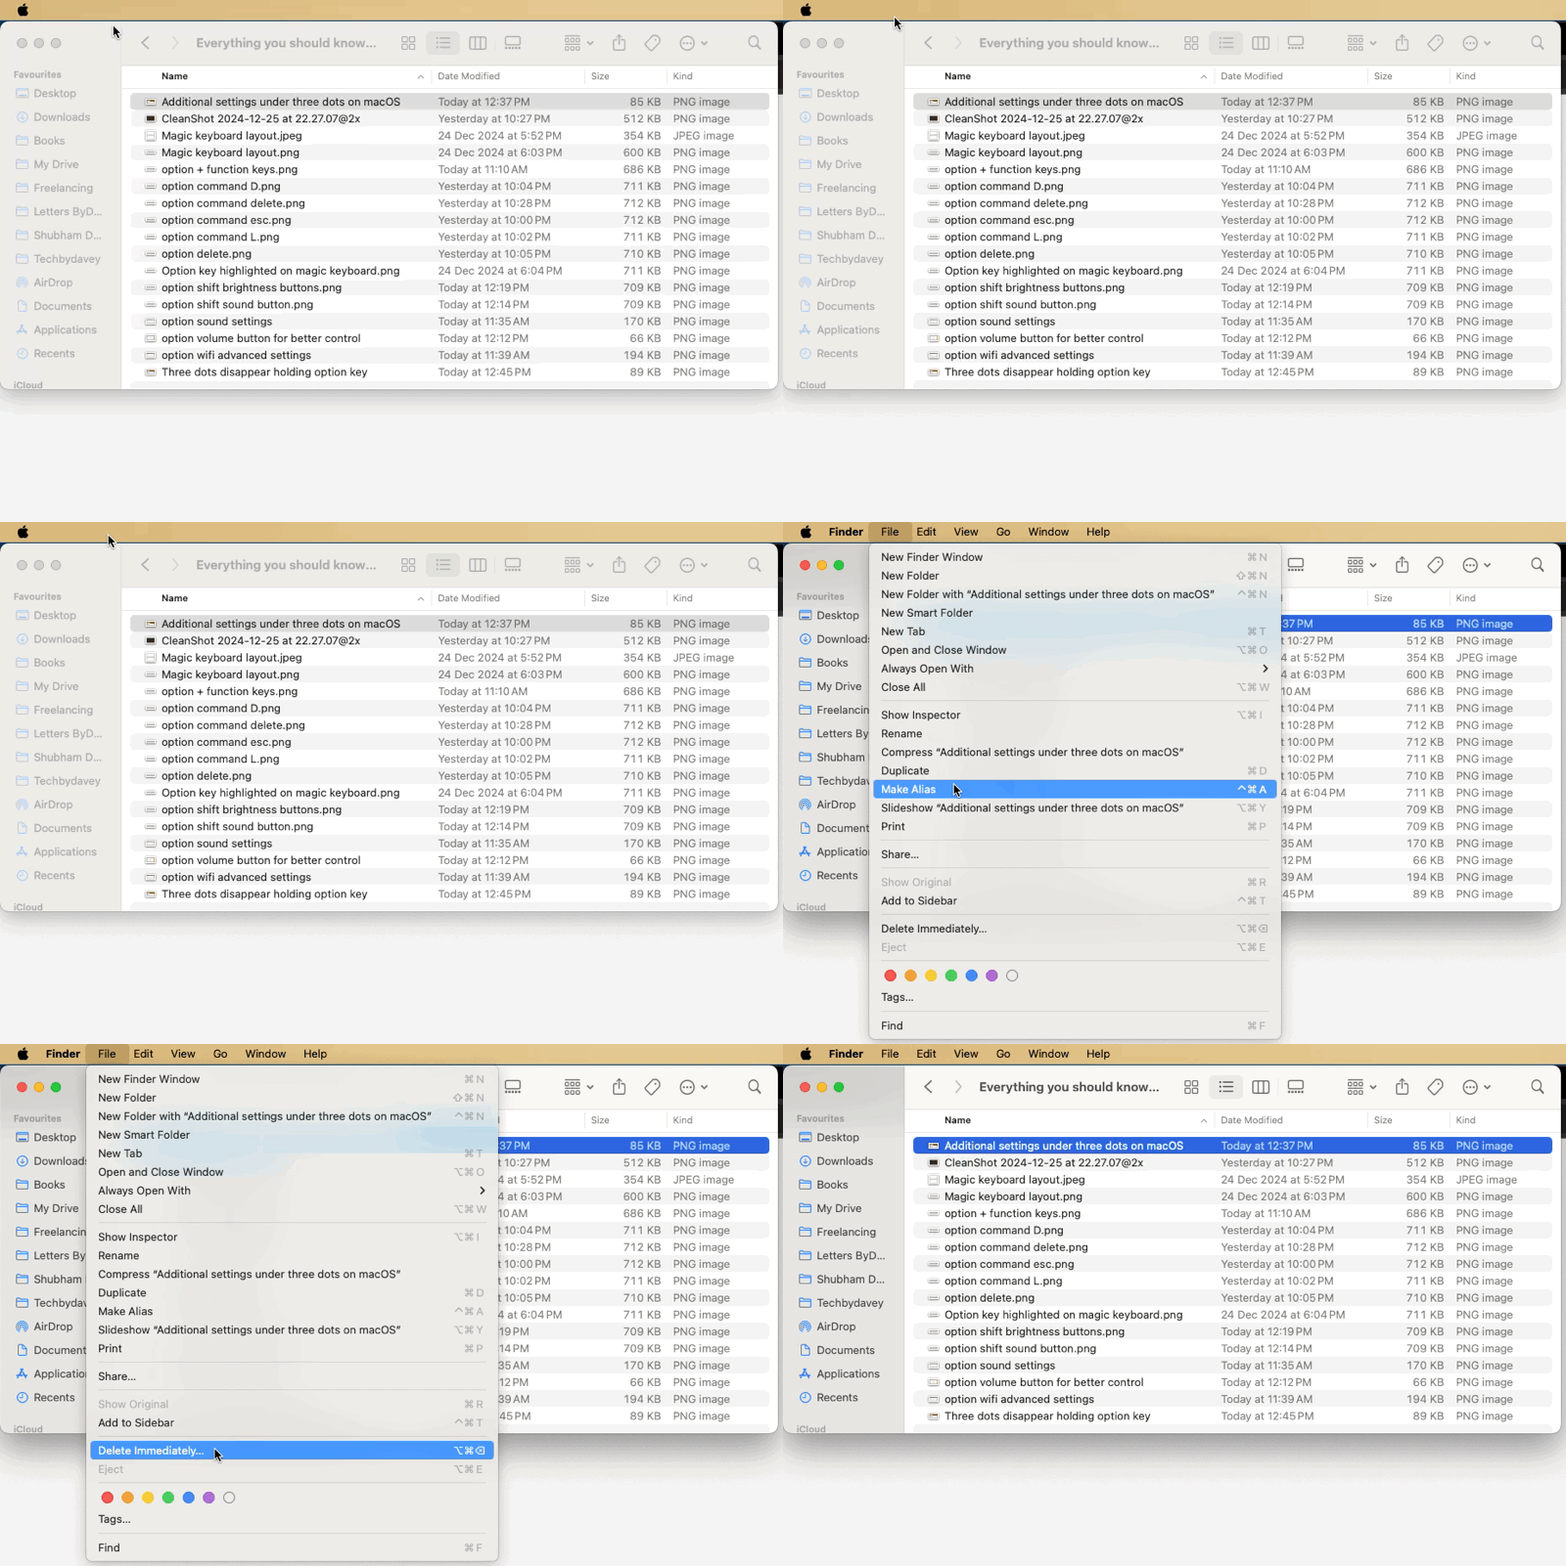
Alternatively, you can select a file or folder in the finder app, click on “File” in the menu bar, and press the Option key (⌥) to see the Delete Immediately option instead of Move to Bin.
#3.4 Option+double-clicking a folder opens it in a new window while closing the current one.
Advanced System Interactions With The Option Key (⌥)
#1 System Preferences and Settings
Option-clicking function keys open corresponding system preference panes.

#2 Network and System Information
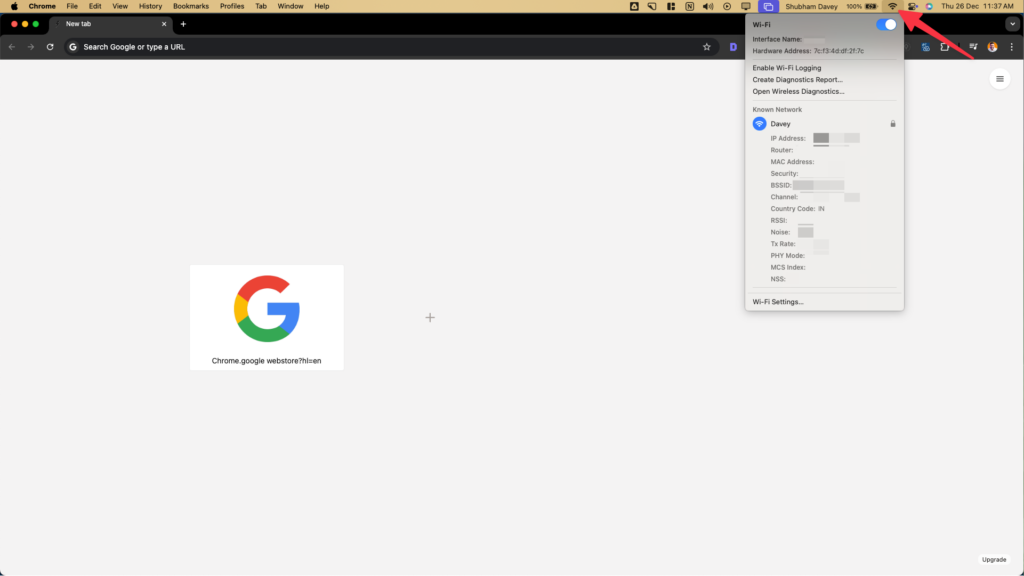
Option-clicking the Wi-Fi icon in the menu reveals details of the network connection.
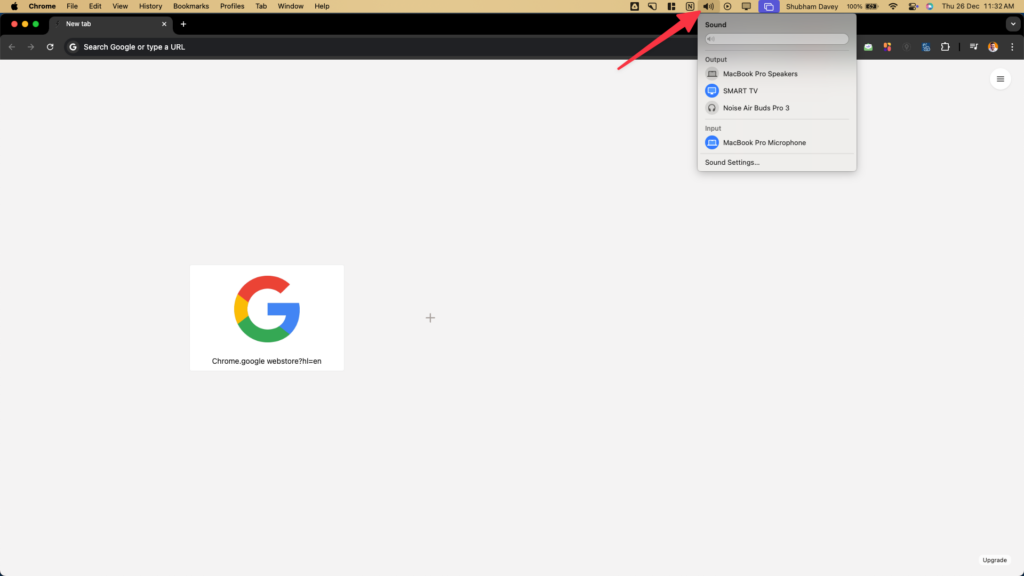
Option-clicking volume icon allows changing audio input/output devices.
#3 Keyboard Shortcut Enhancements
#3.1 Option + Command + ESC: Force quit applications

#3.2 Option + Command + Power Button: Put Mac to sleep instantly

#3.3 Option + Command + L: Open the Downloads folder in the browsers

#3.4 Option + Command + D: Show/hide Dock

#3.5 Option + Delete: Delete entire words instead of characters

#4 Control brightness & volume better
#4.1 Hold the option+shift+volume buttons to precisely control the volume

By default, the volume increases by 16 points. But when you hold the combination of option+shift+volume buttons, the volume increases/decreases by 64 points.

The same goes for the brightness buttons as well. Hold the option+shift+brightness buttons to precisely control the brightness in 64 steps, just like the volume.

#5 Restart & Shut down instantly
Across macOS, wherever you see menu items ending with three dots, additional settings are nested under that menu. Usually, you will be asked for confirmation when you click on those menu items.
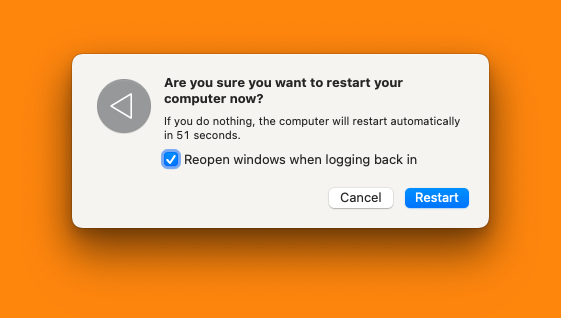
For example, the Restart and Shutdown menu under Apple System Settings has three dots, as shown below.
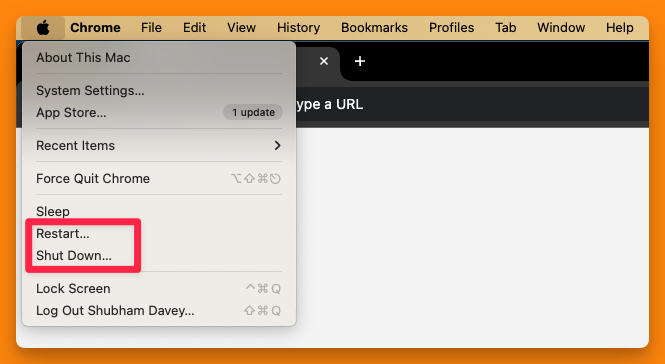
However, the three dots disappear when you hold the option key (⌥) while the menu box is active. You can bypass the confirmation message and directly shut down or restart.
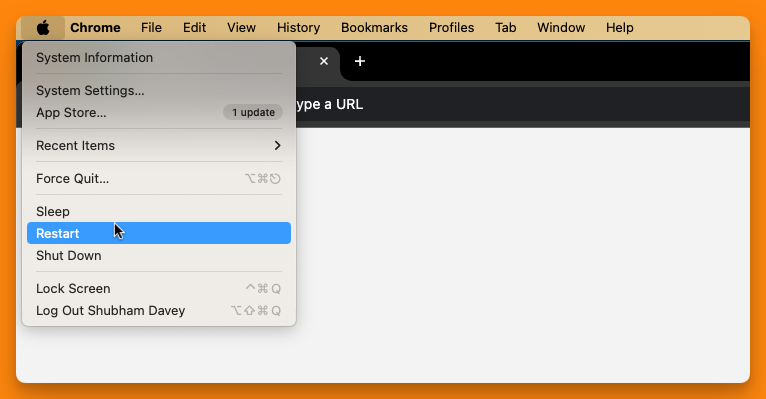
Notice how About This Mac becomes System Information. This way, you can directly navigate to the “System Information” page while holding the option key (⌥).

#6 Force Quit Apps
At times, when an application installed on your Mac turns unresponsive, it becomes frustrating to force quit the application.
Instead of navigating to Activity Monitor to force quit the app, you can right-click (or double tab, based on your trackpad settings) on the application in the dock and then press the option key (⌥). This will show the Force Quit option instead of just Quit.

#7 Access the “Save as” menu
This is a workflow problem, mainly if you’re used to the Windows ecosystem. There’s no Save As option by default. In Windows, Ctrl+Shift+S is a shortcut for the Save As option, but on macOS, command+Shift+S duplicates a file.
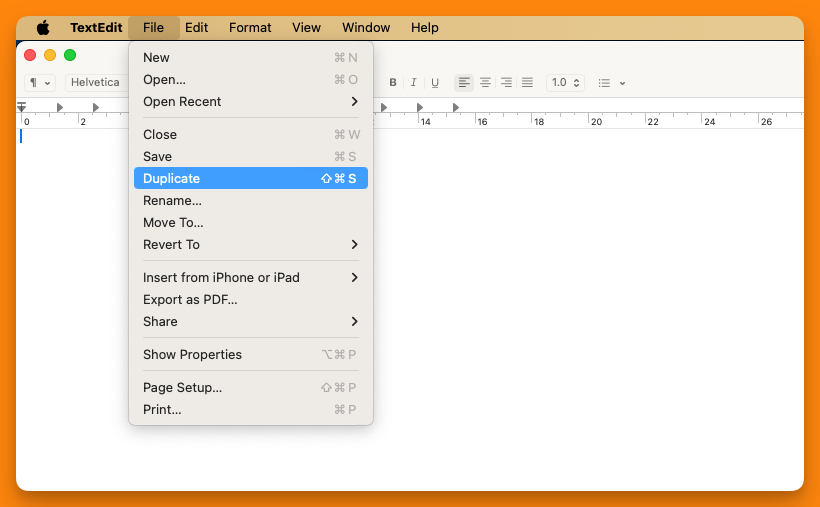
However, by pressing the option key (⌥) while the ‘File’ menu is active, the Duplicate menu becomes “Save As”.

#8 Close all app windows at once
If you have multiple windows of Google Chrome or TextEdit files, let’s say. By default, you can’t close all windows all at once. Under the file menu, you can only see the Close option (⌘+W). This closes only the active window, and others will remain active.
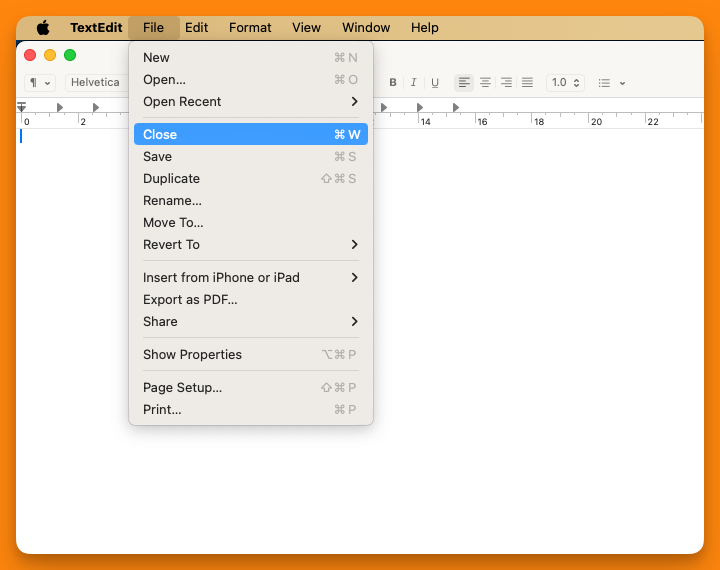
But, if you press the option key (⌥) while the file menu is active, the Close menu will change to Close all, as shown below.
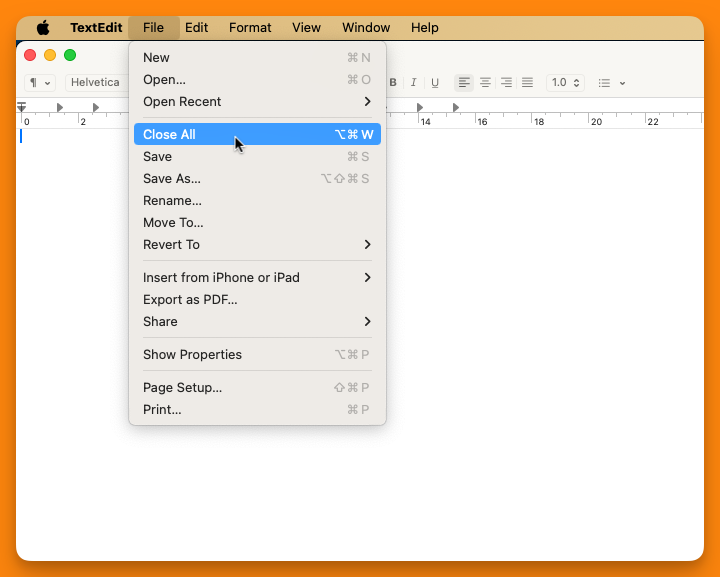
This will close all the windows, but the application won’t be quit from the background. You will still need to quit an app from the dock or command+tab+Q to quit the specific tab.
#9 Get info for multiple files/folder
By default, right-clicking on a file/folder shows the Get Info menu under the File in Menu bar. Selecting multiple files and clicking on the “Get Info” menu opens multiple pop-ups for all the selected files/folders.
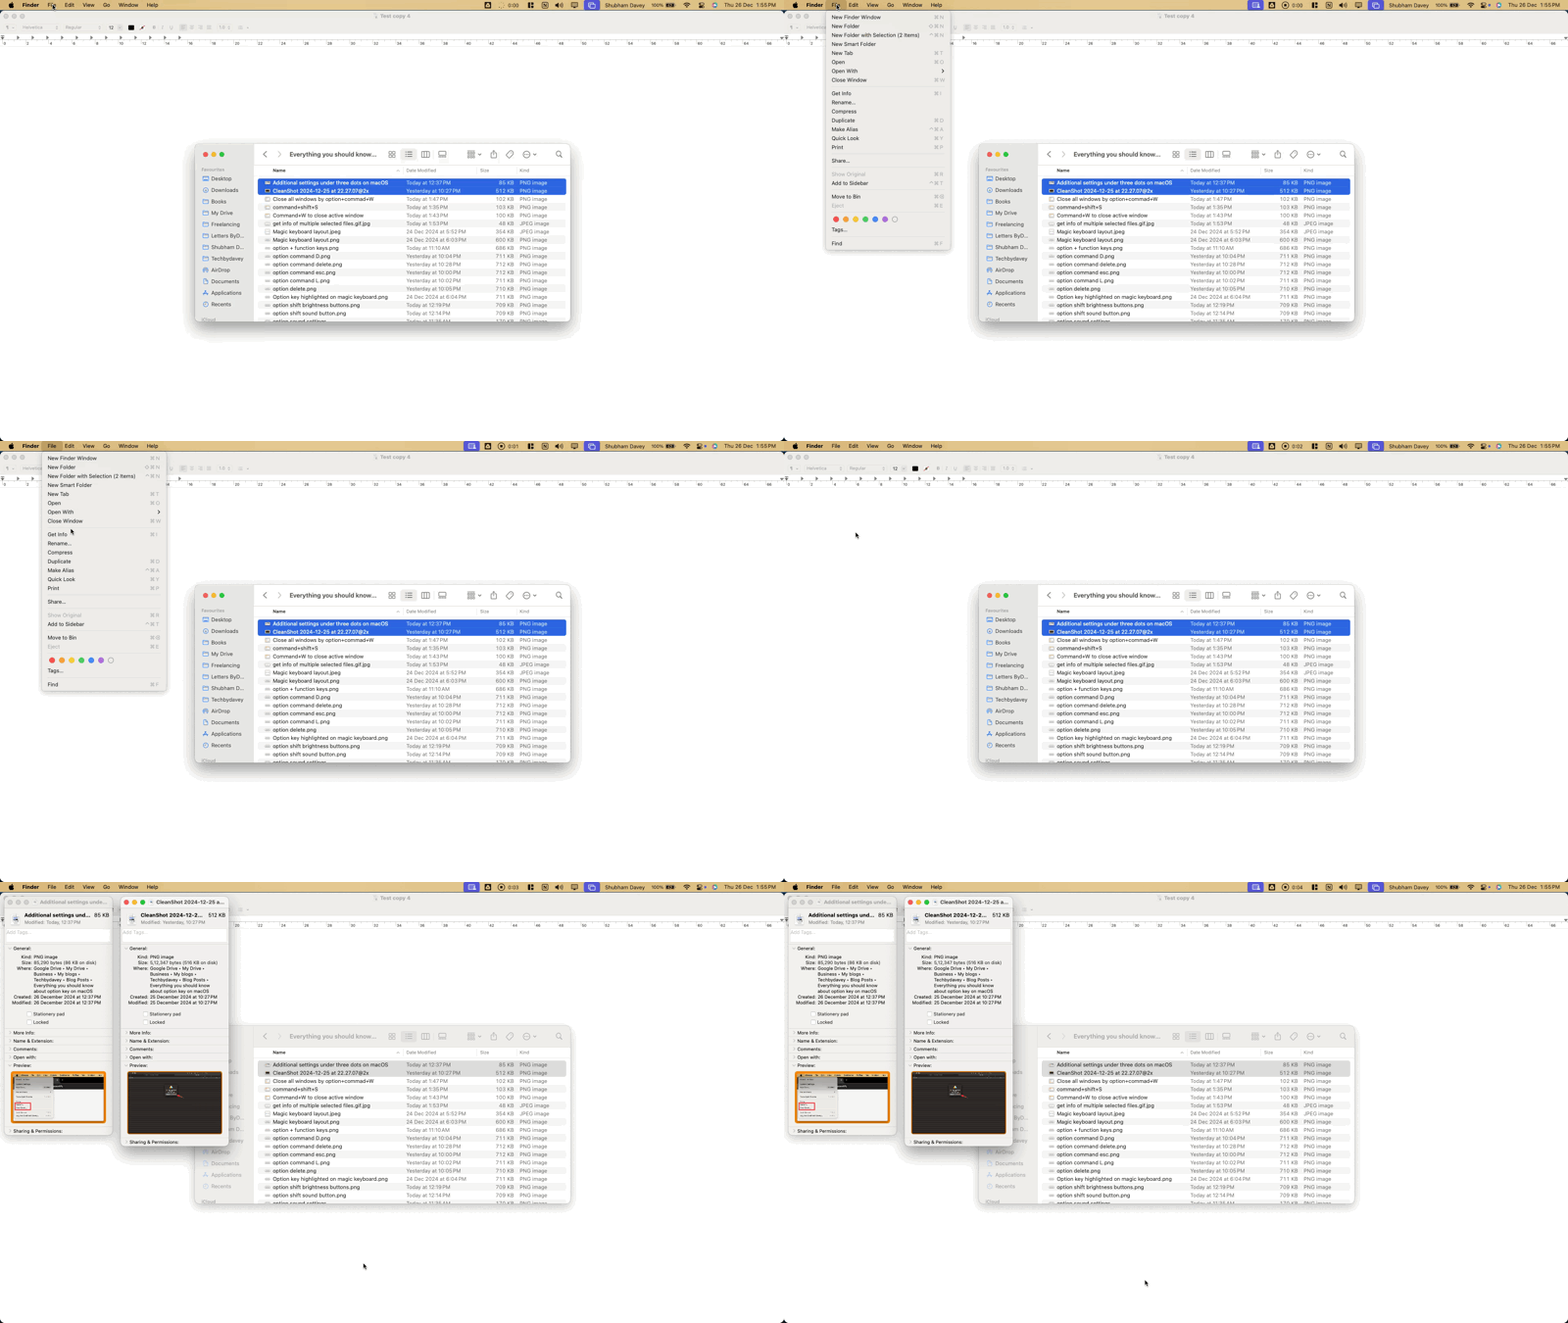
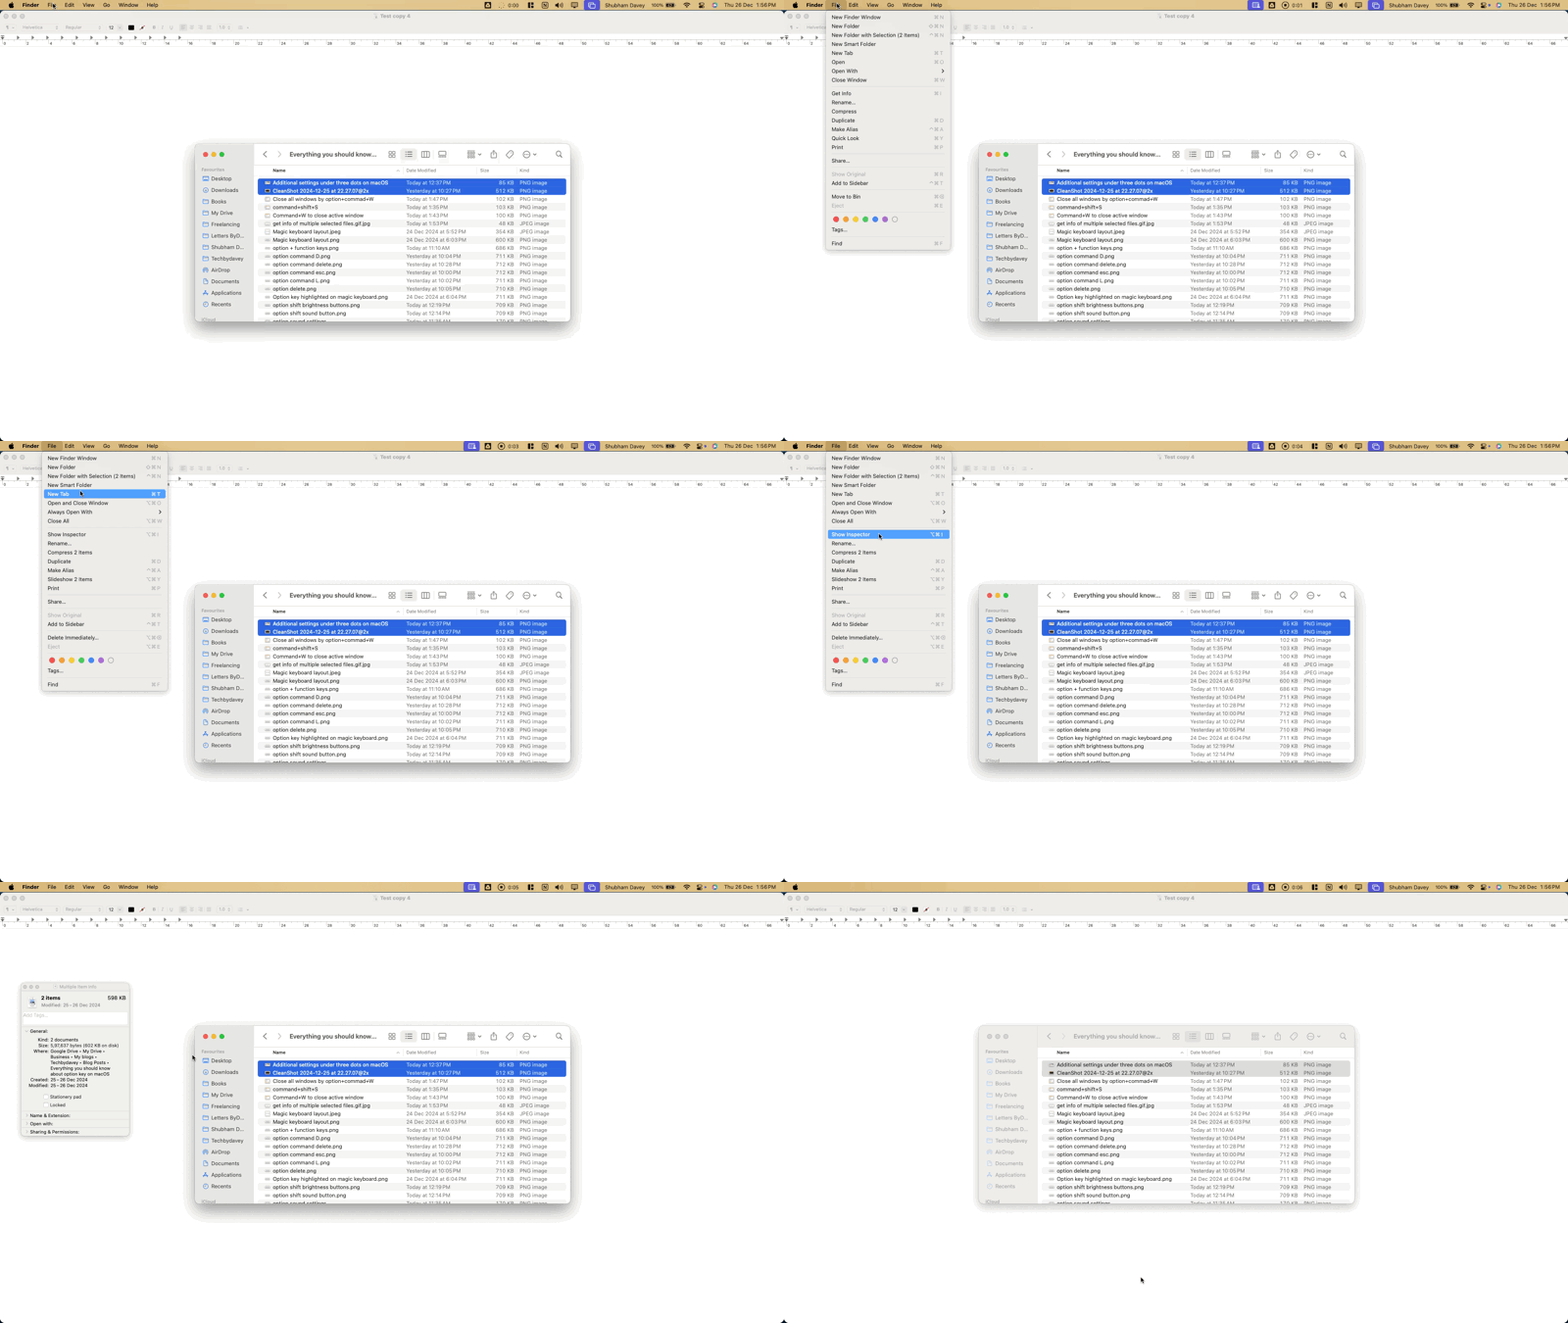
However, if you press the option key (⌥) while the File menu is active, the “Get Info” changes to “Show Inspector”.
#10 Cut-Paste files/folders
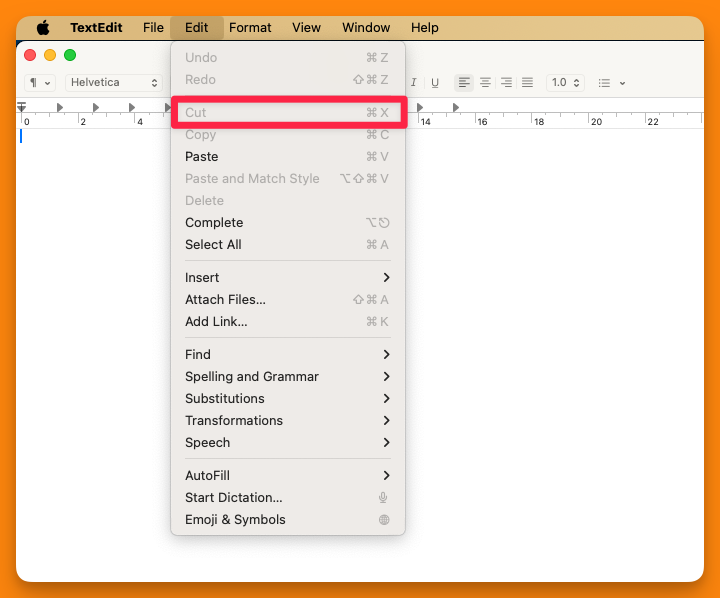
I wish there were a simple way to move files on macOS, such as Ctrl+X & Ctrl+V, in Windows. By default, the cut option is grayed out under the Edit menu.
There’s a slightly lengthy workaround on macOS. First, copy the file/folder you want to move. Then navigate to the location, press option key (⌥), and the “Paste” menu will become “Move Item Here”.
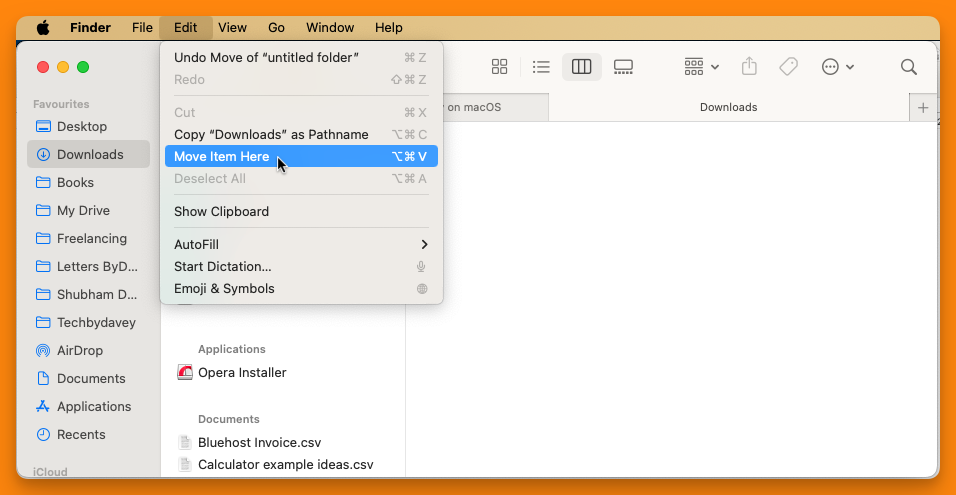
You can press the combination of option+command+V to move the item to that location. Alternatively, you can drag and drop the files/folder from one location to another.
#11 Change default apps
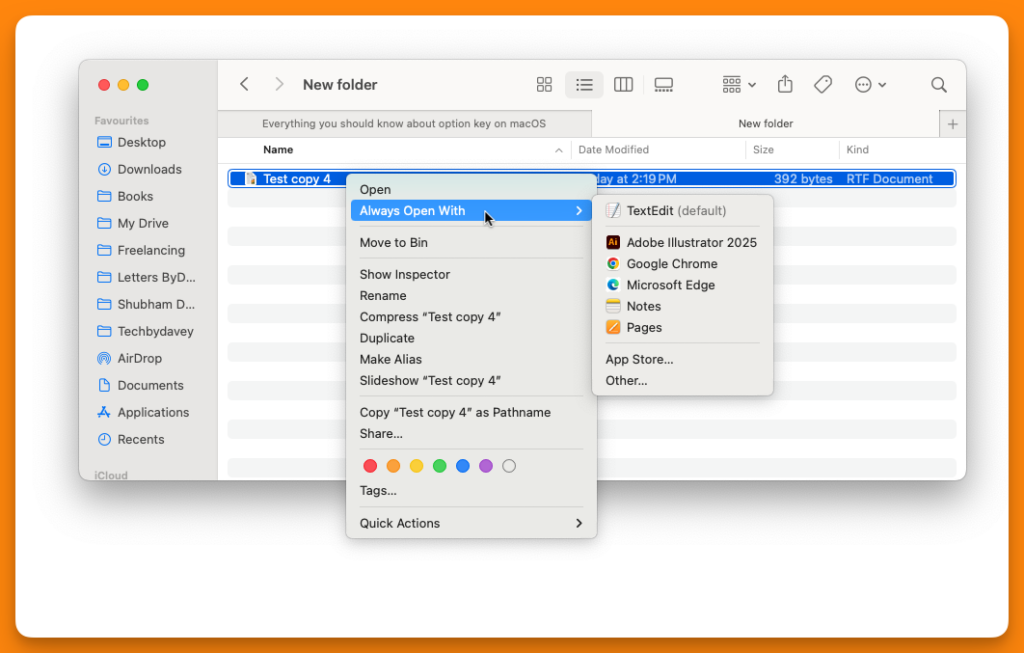
You can set default apps for files on macOS. There’s little to no provision to set default apps other than a browser for macOS. You will see the “Open With” option if you right-click on any file. This opens the file in the chosen application just once.
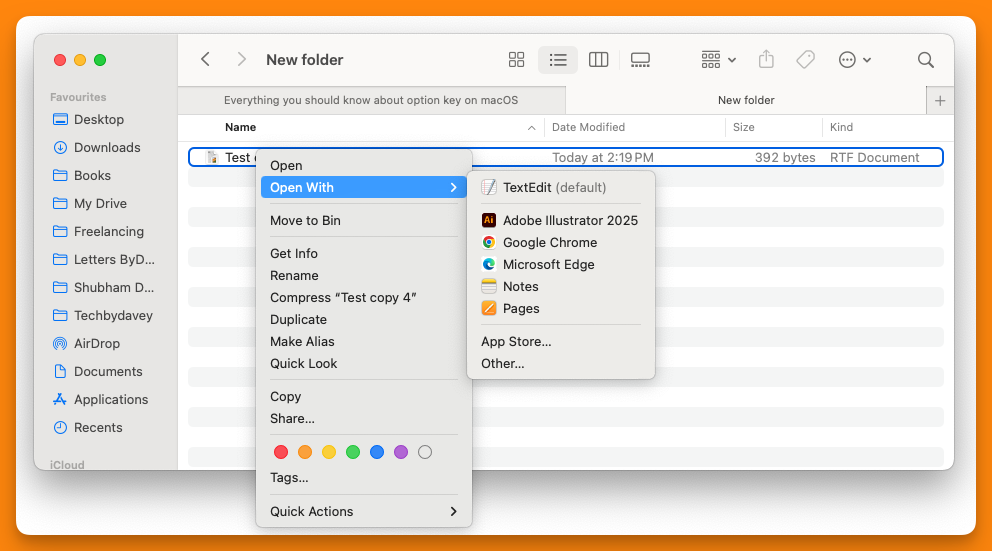
However, if you press and hold the option key (⌥) while the right-click menu for the selected file is active, the Open With option becomes “Always Open With”
When you select an application to open a file, such file types will always open in the defined application.
#12 View various window tiling options
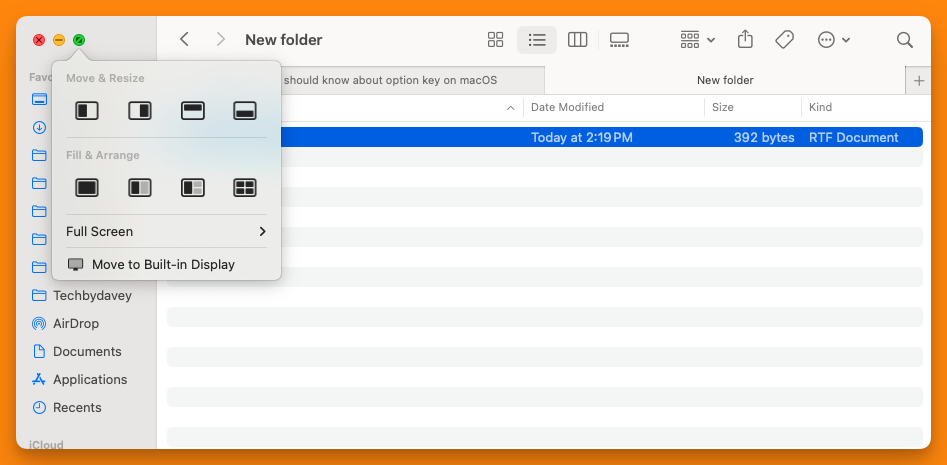
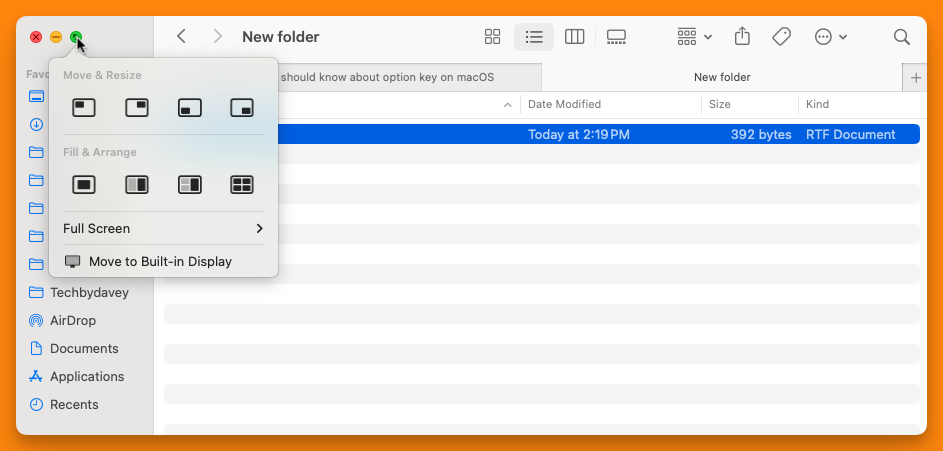
When a window is not in full screen/maximize mode, hovering on the green button while holding the option key reveals various tiling options.
This is what the tiling option looks like when you click without holding the option key (⌥).
However, by holding the option key (⌥) while clicking on the green button in the top left of the window, you will see different tiling options.
Option key (⌥) works with other apps as well
Option key (⌥) opens several combinations of shortcuts for macOS and installed apps on your Mac machine.
Explore what installed apps do when option key (⌥) is pressed. How helpful the option key (⌥) is in your workflow will surprise you.


