TL;DR & Summary
Midjourney AI is a beginner-friendly platform that uses generative technology to convert written text into visual images. This beginner-friendly guide will walk you through the process of getting started with Midjourney AI, from creating an account to creating your first image.
Midjourney AI is an easy-to-use platform for beginners that allows you to transform the written text into visual images using generative technology.
In this guide, I’ve compiled step-by-step instructions on how to get started with Midjourney AI, so you can create stunning visuals that bring your text to life. Whether you’re a writer, marketer, or designer, Midjourney AI is a great tool to help you communicate your message effectively.
Getting started with Midjourney AI
Midjourney AI is a powerful tool that can help you transform the text into visual images using generative technology. Whether you’re a writer, marketer, or designer, Midjourney can help you create compelling visuals that effectively communicate your message.
However, getting started with Midjourney AI can seem daunting at first, especially if you’re new to generative technology or image creation.
In this guide, I’ll walk you through the process of getting started with Midjourney, from setting up an account to creating your first image.
By the end of this guide, you’ll have the knowledge and skills you need to use Midjourney AI to create stunning visuals that bring your text to life.
How to install Midjourney Bot?
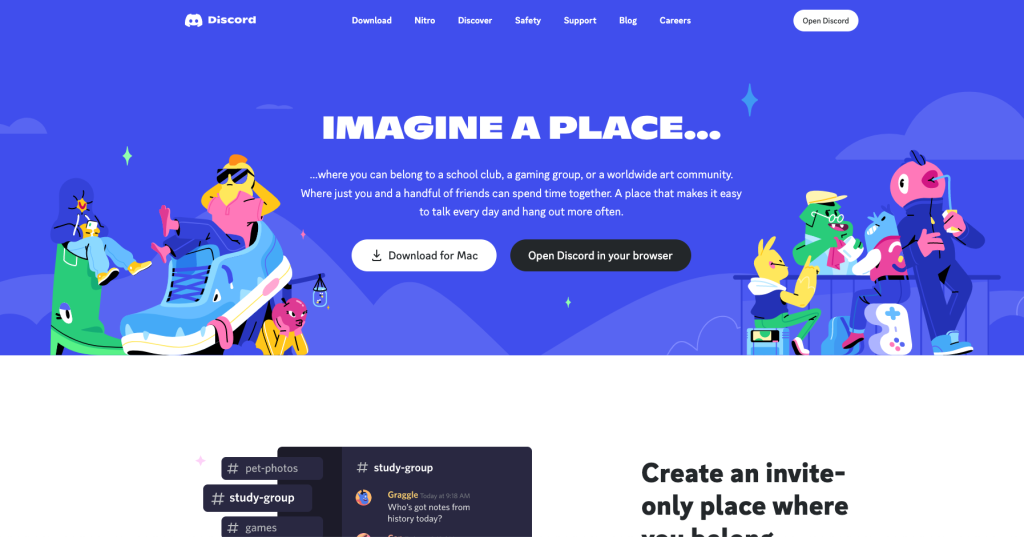
Step #1: Install Discord or create an account on Discord
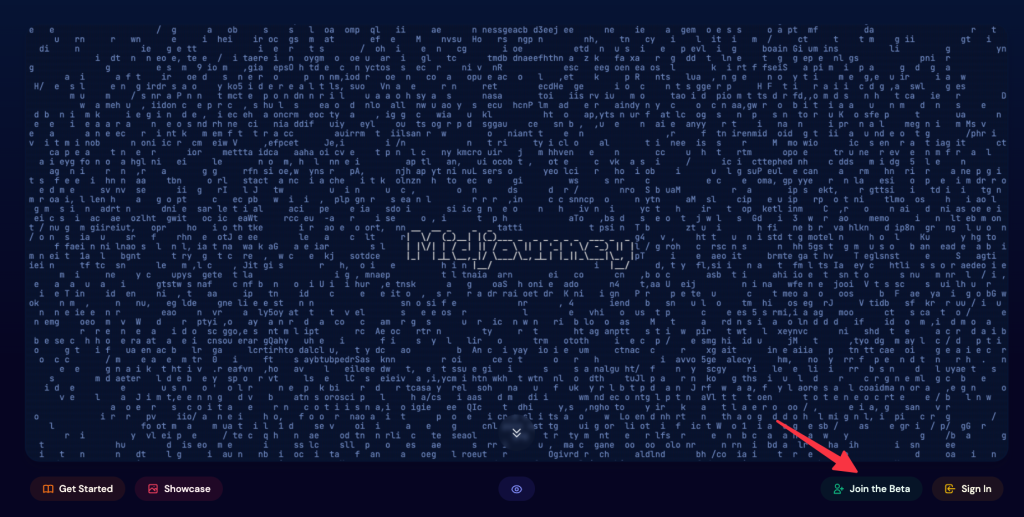
Step #2: Navigate to the Midjourney home page and click on Join Beta (you will receive an invite to join the discord server)
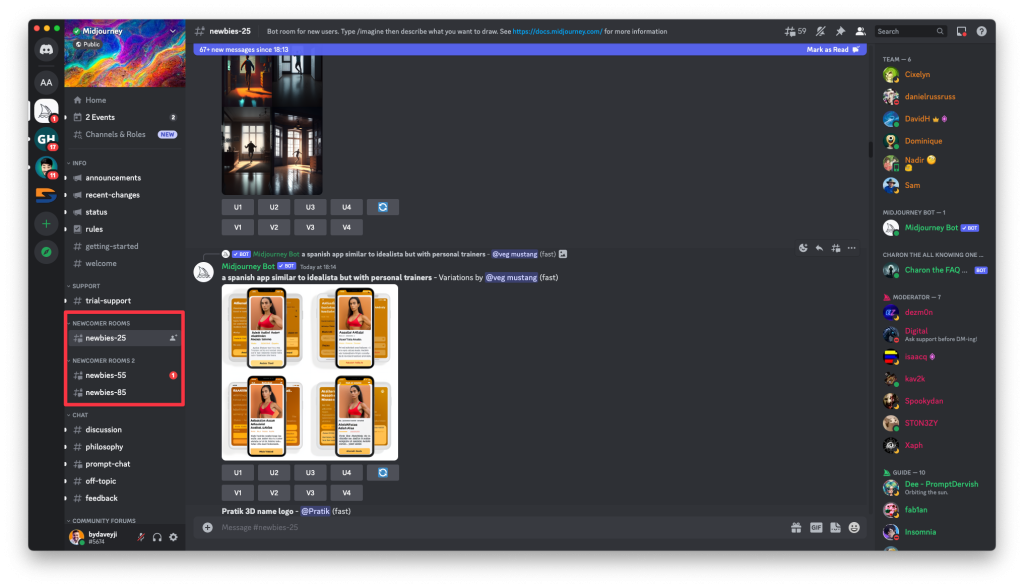
Step #3: Once your account is ready on Discord & accepts the midjourney invite, you will see the midjourney server. On your left, click on any channels under “NEWCOMER ROOMS” as shown below. These are the rooms where you can enter the prompts to create breathtaking images that midjourney AI has to offer.
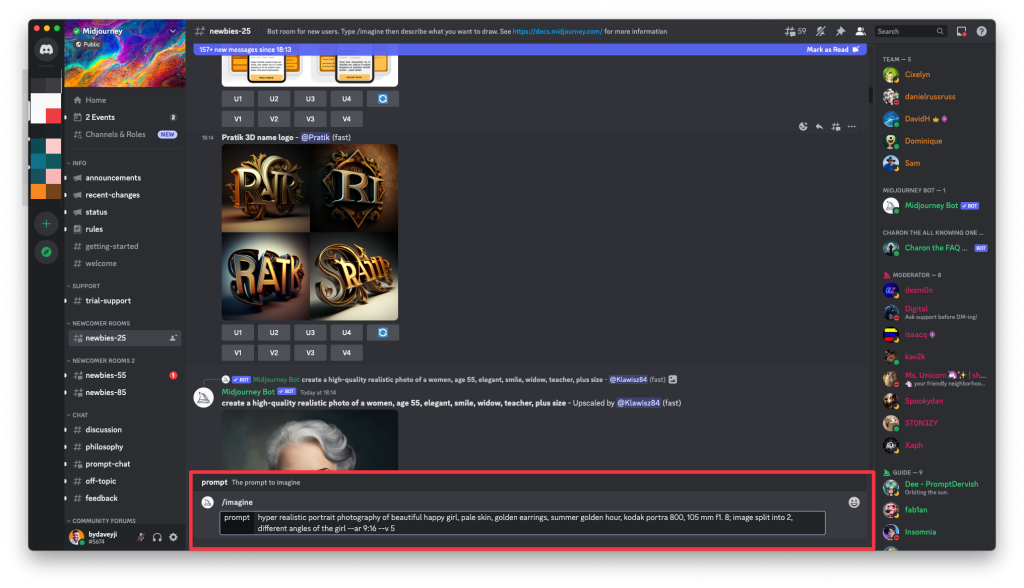
Step #4: Trigger the midjourney AI by typing “/imagine” followed by the prompt to generate an image.
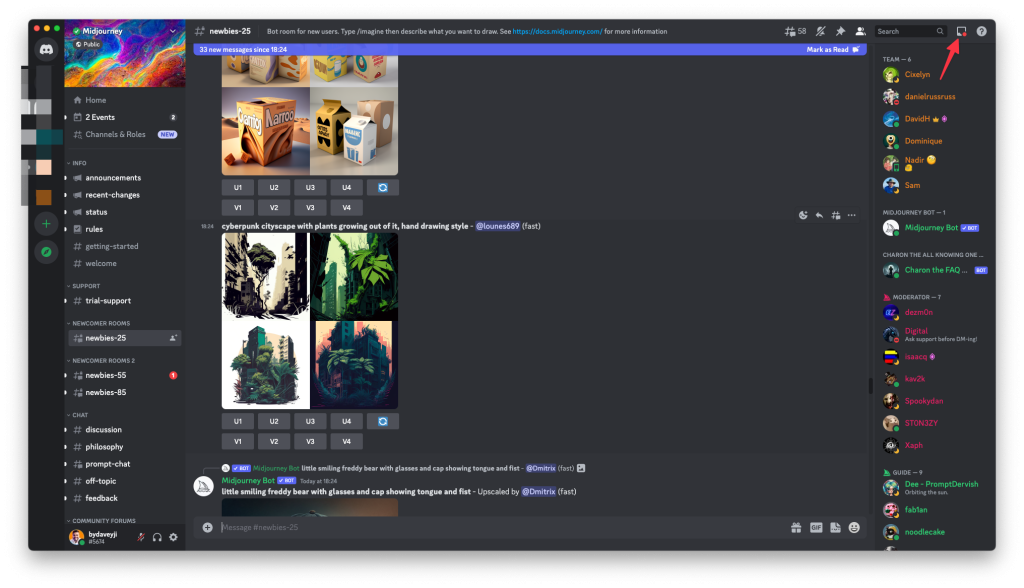
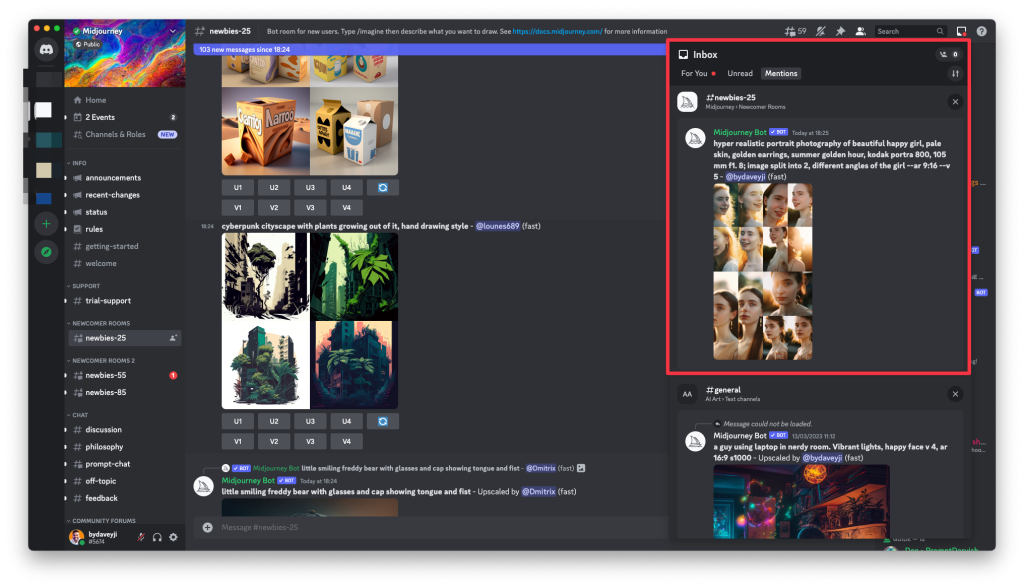
Step #5: Since this is a public room, thousands of people would be requesting the images. Your prompt will be lost in the chaos. Click on the inbox icon in the top right and then click on the “Mentions” tab.
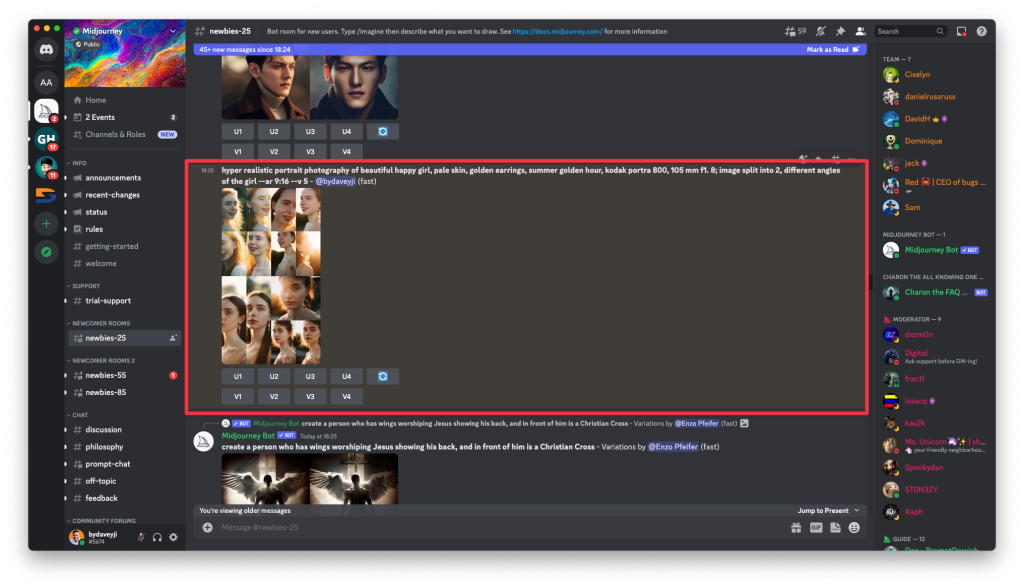
Step #6: Jump to the results or directly open the image for preview. Midjourney will create 4 versions by default. If you want to create more versions or upscale any of those 4, you can do that now.
Step #7: Once you jump on to your message, you can now make changes to the image as you wish.
Creating a private server with a Midjourney bot
To avoid the chaos, you can create a private server on Discord and add the midjourney bot (that generates cool images for you) to that private server and enjoy creating images without getting distracted by any other images.
Here’s how to create a private server on Discord for Midjourney:
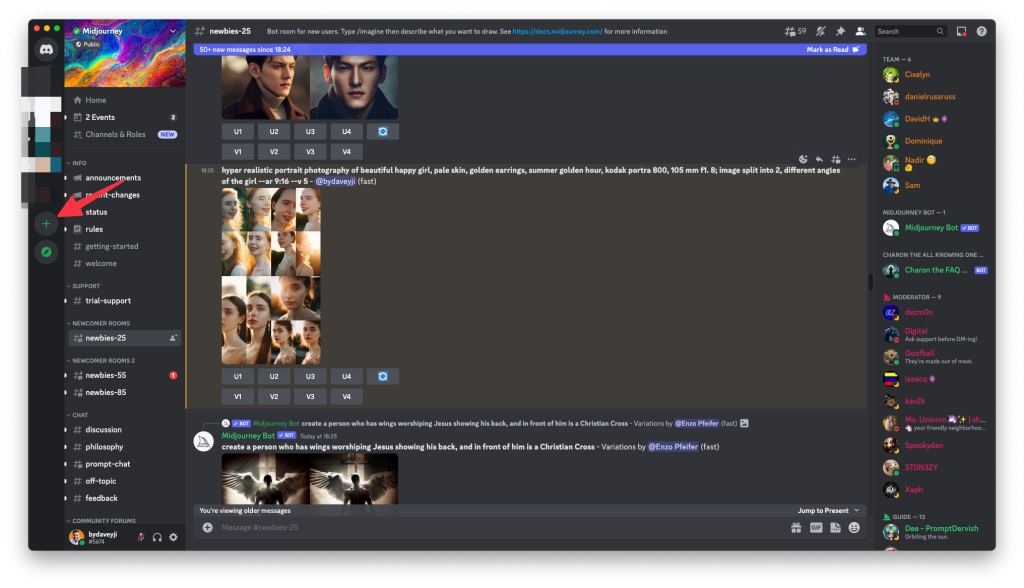
Step #1: Click on the plus icon in the left corner of the discord screen
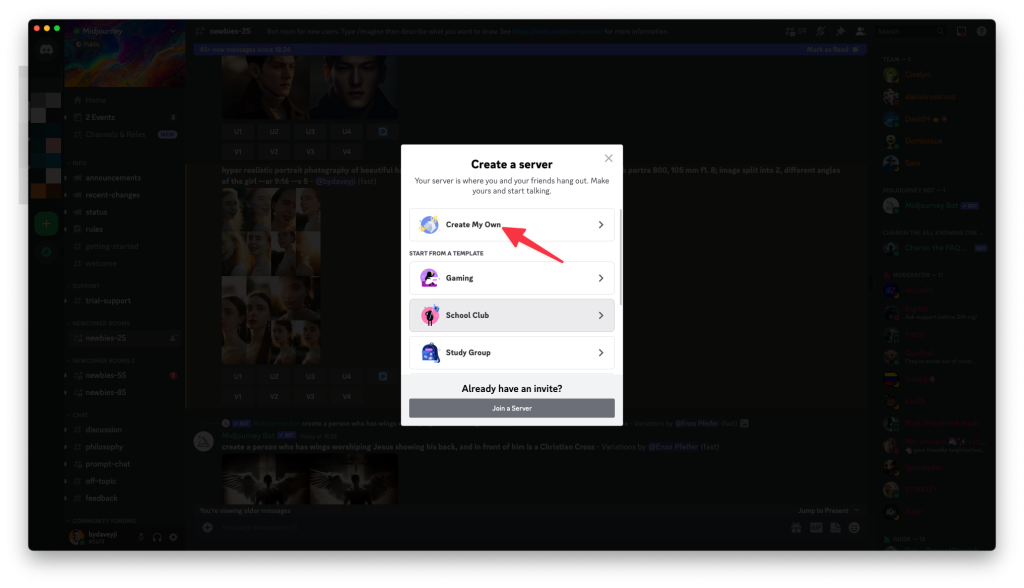
Step #2: Click on “Create My Own”
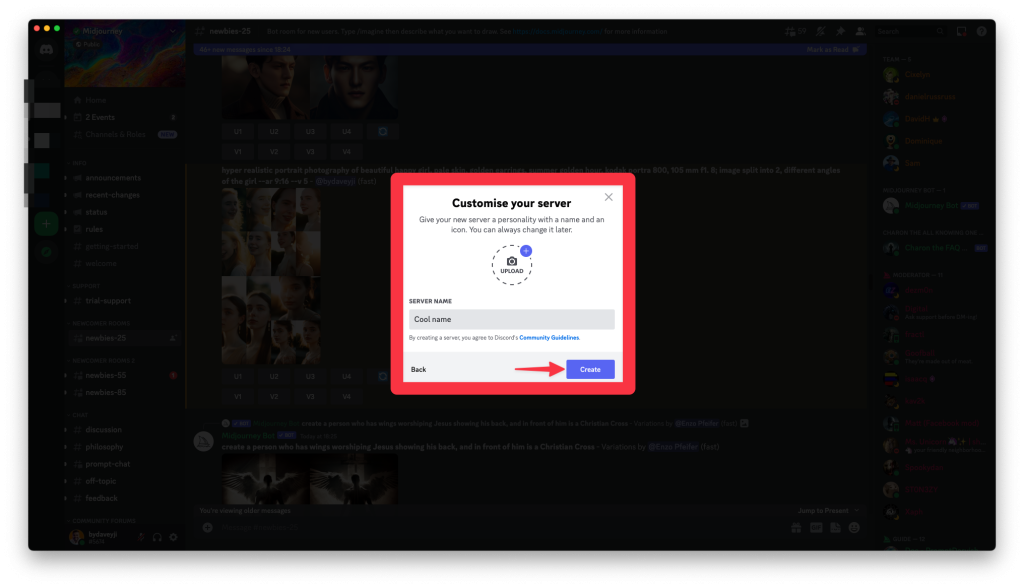
Step #3: Skip the question to describe the server & in the next screen, name the server and add a profile picture if required. Then click on the “Create” button to create the server
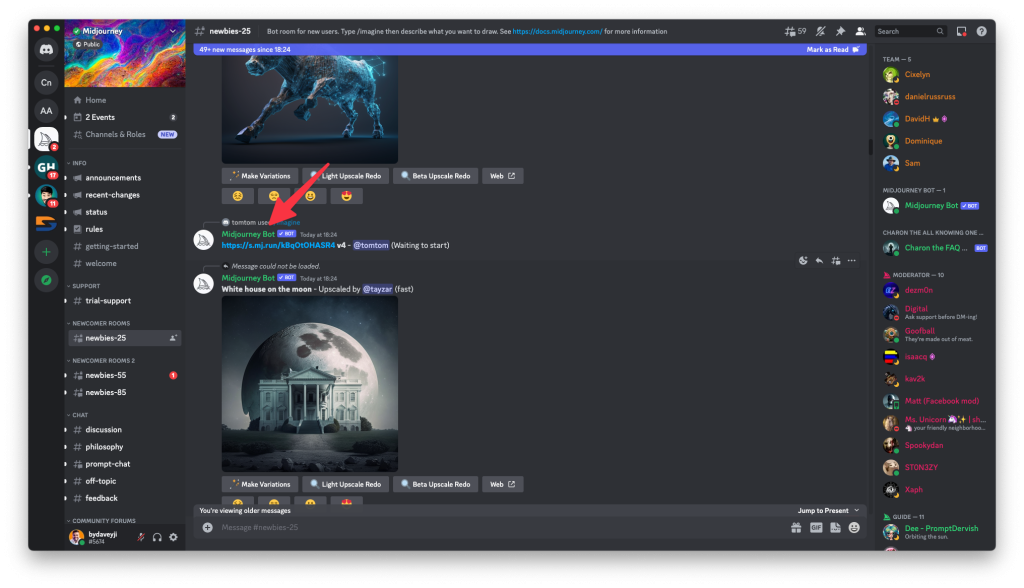
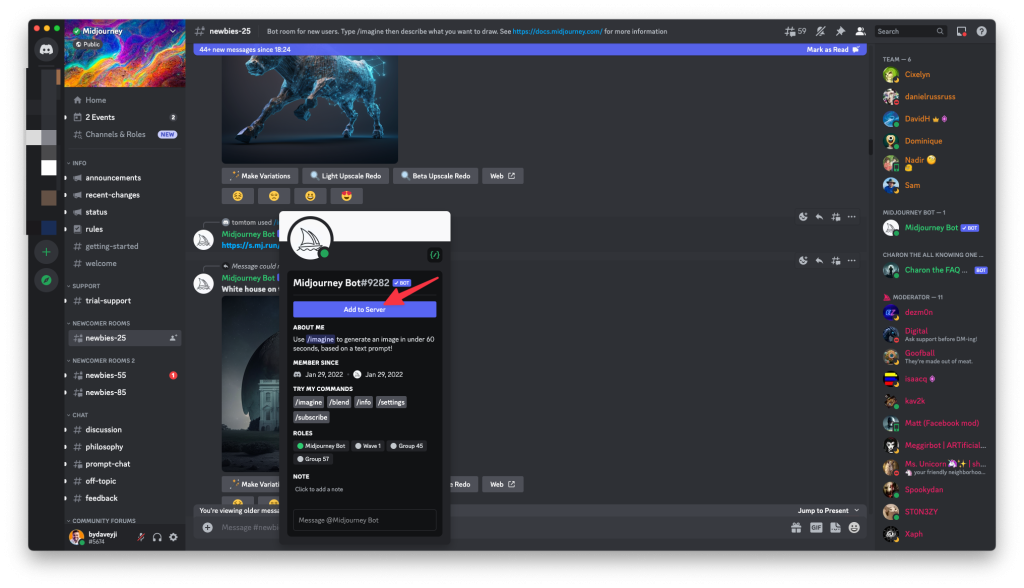
Step #4: Go back to Midjourney’s server and find the midjourney bot. You can find it everywhere on the channel (especially in newbies’ rooms). If you can’t find the Midjourney Bot, look at the member’s section on the right. Click on the midjourney bot name
Step #5: Click on Add to Server button in the pop-up shown
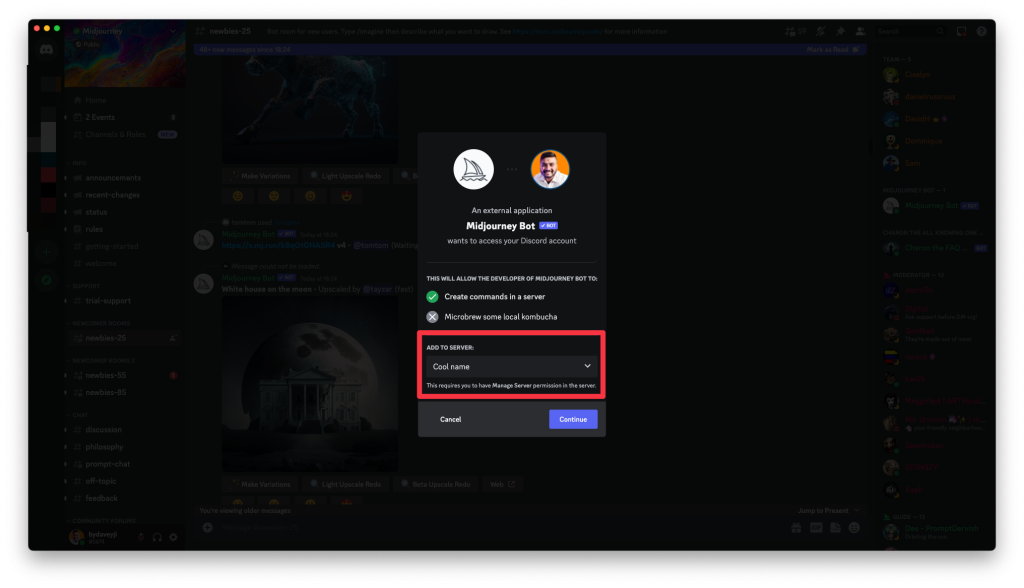
Step #6: Select the server you want to add the Midjourney Bot to. All your private servers will be listed in the dropdown. Make sure you select the right one
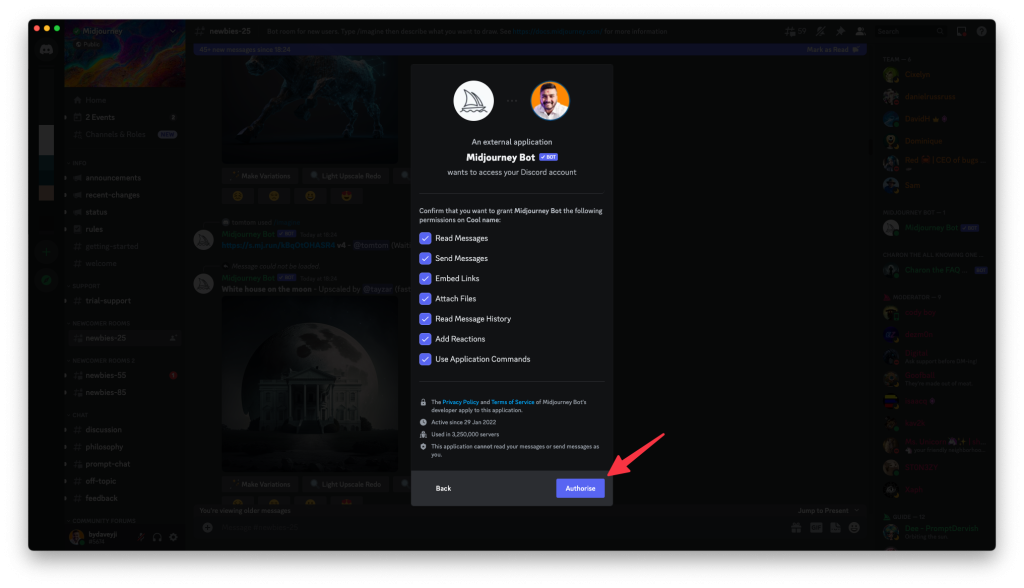
Step #7: Click on Continue & then you will be required to authorize permissions to add the bot to the private server
With this, the Midjourney bot is added to your private server on Discord. You can interact with the bot without any clutter in your chat.
To chat with the Midjourney Bot, simply open the server from the left corner and type ‘/imagine’ & give a prompt to start the magic.
Midjourney AI tips & tricks (Know these before using Midjourney AI)
- Use unusual or creative input text to generate more unique and unexpected images. Learn the prompts from the Midjourney AI community.
- Experiment with different combinations of image styles, such as abstract or surreal, to create more eye-catching visuals.
- Try using Midjourney AI to create images that are not just static visuals, but also include animations or other interactive elements.
- Use Midjourney AI to create personalized images for specific audiences or individuals, such as personalized birthday cards or social media posts.
- Utilize the “Randomize” feature (🔄) to generate multiple variations of an image, and then choose the best one for your project.
- Use Midjourney AI in combination with other image editing tools, such as Photoshop or Canva, to create even more complex and dynamic visuals.
- Use Midjourney AI to create images for unconventional or niche purposes, such as album covers or book covers.
- Try using Midjourney AI to create 3D or virtual reality images, opening up new possibilities for immersive and interactive content.
- Utilize the “Clone” feature to create variations of an existing image, saving time and effort in the creation process.
- Use Midjourney AI to create images that are not just visually stunning, but also convey a deeper message or meaning, such as social commentary or political satire.
Now that you’re aware of the tips & tricks, let me share some specific steps to make the most of Midjourney AI.
How to save credits (especially if you have a paid plan)?
By default, Midjourney will generate images in ‘fast’ mode which consumes a lot of credits. If you’re on a paid plan, switch to ‘/relax’ to consume fewer credits.

Unless you’re on a plan with higher fast hours, you should switch to relax minutes, which are slightly slow in generating the output.
Make sure, you check out your plan before generating content.
Controlling the Aspect Ratio of the Images
The aspect ratio is how tall & wide the output is going to be. It is denoted by “–ar <followed by the aspect ratio>”
For example, if you want to generate square images for social media, don’t mention the aspect ratio, the images are by default generated in the ratio suitable for social media.
Checkout this guide to learn more about the various aspect ratio available for you to create images.
Notes:
- The aspect ratio is width:height, mention the numbers accordingly.
- If you want to create tall images (for stories on social media) you need to instruct the bot to use version 3. Simply mention “–v3” to instruct the bot to use version 3 for your prompt.
Stylize the images on Midjourney AI
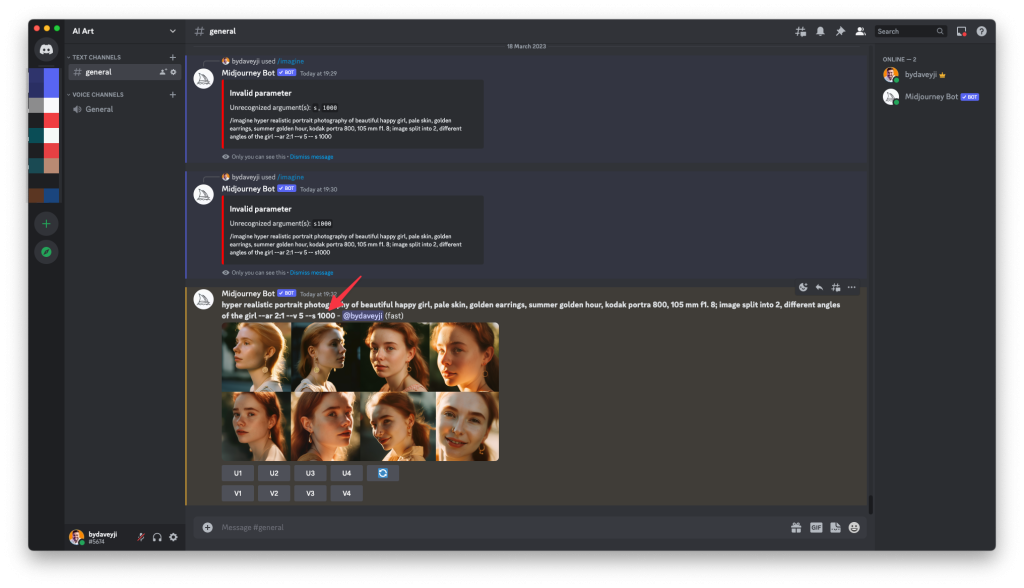
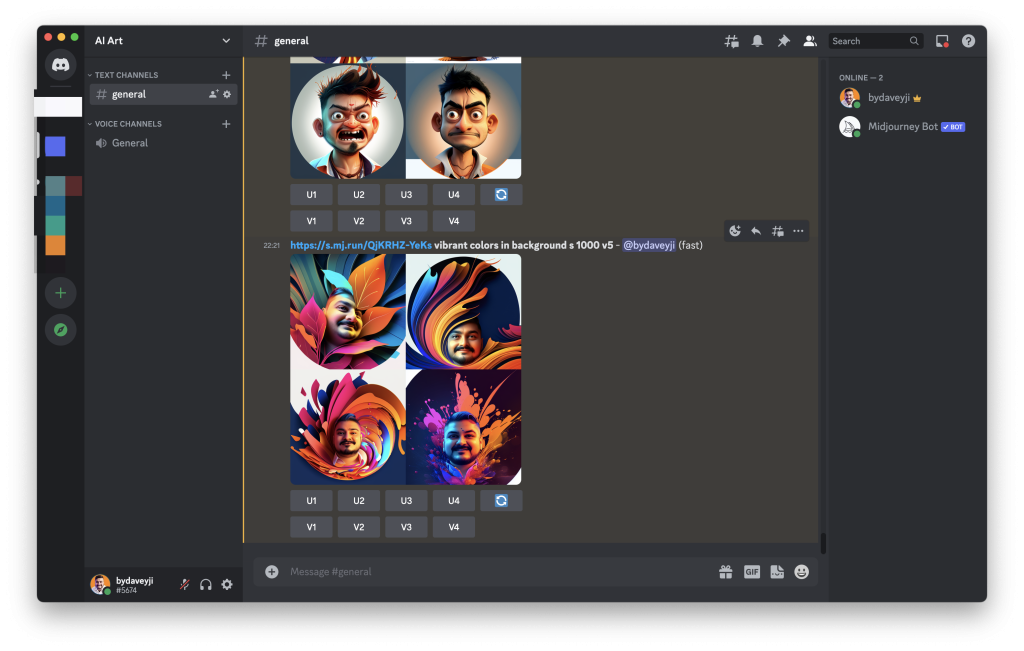
You can stylize the images that Midjourney generates by instructing it accordingly. At the time of writing, Midjourney version 5 is live and you can stylize images by using “–s <number between 1 to 1000>”. The higher the number, the higher you’ll see the touch of AI.
There will be a visible difference between the images with stylized commands. See the following output with stylize of 1000.
Now check out the difference of the prompt with stylize of 100. Click here to view the image in fullscreen.
There’s a visible difference in detail & impact of AI on the output. Since these are realistic photos, you may not see the difference immediately, but if you try to stylize in cartoon artistic creations, you’ll see a significant difference.
No Command on Midjourney AI
If you want to exclude obvious/specific objects from the output, you can instruct that using the no command.
Along with the description of the prompt, mention “–no” followed by the object name you want to exclude from the output.
Check out this output that was generated by default by Midjourney Bot
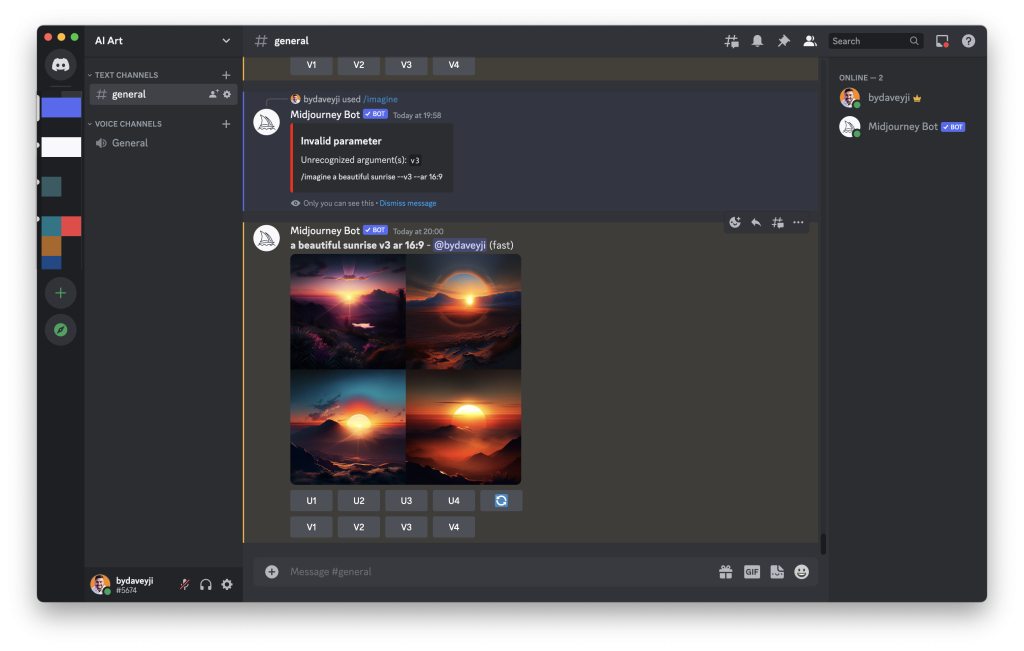
As you can see, there are mountains in all the images generated. You can use the ‘–no’ command to exclude the mountains from the images.
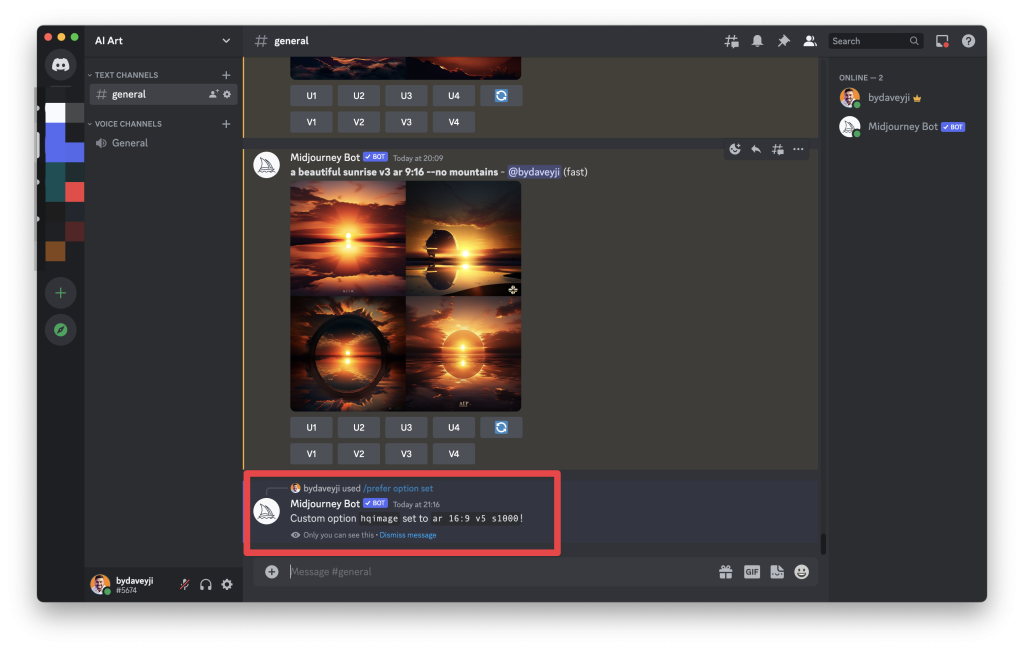
‘Prefer Option Set’ on Midjourney AI
When you have multiple parameters to use, for example, aspect ratio, version & stylize, you can set a shortcut where you enter one word to include all those parameters.
Here’s how to set the shortcuts to auto-fill multiple parameters in Midjourney AI using ‘Prefer Option Set’ settings:
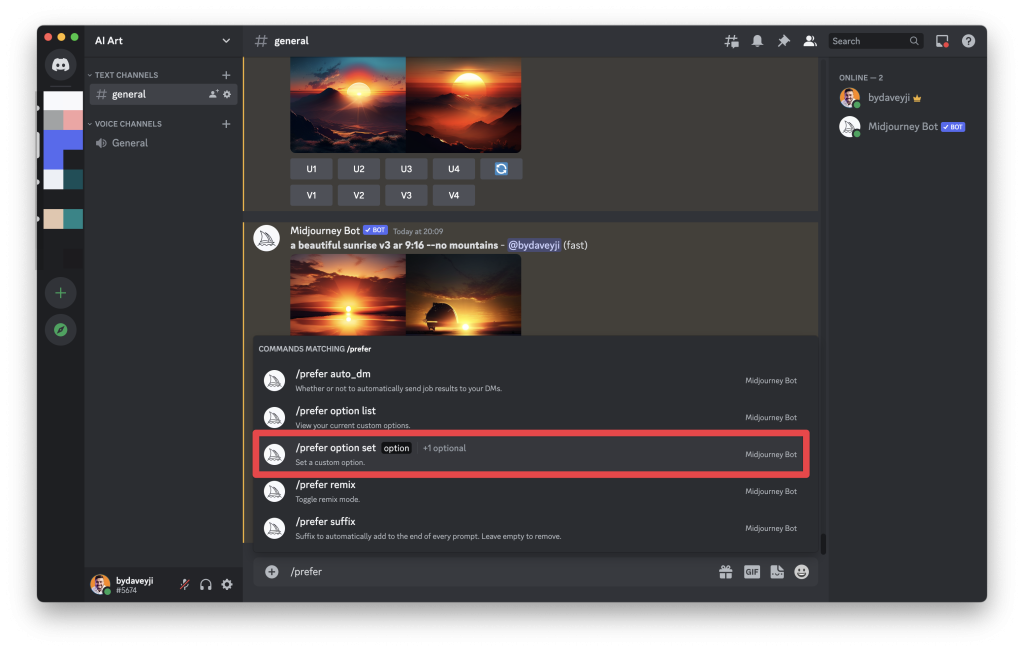
Step #1: In the chat with Midjourney Bot type /prefer
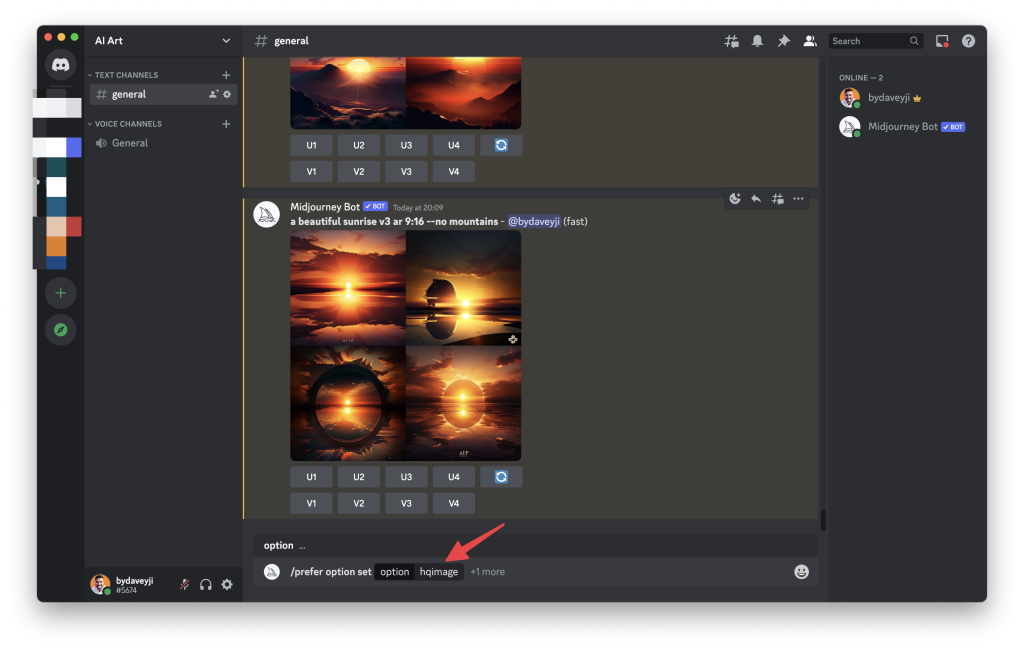
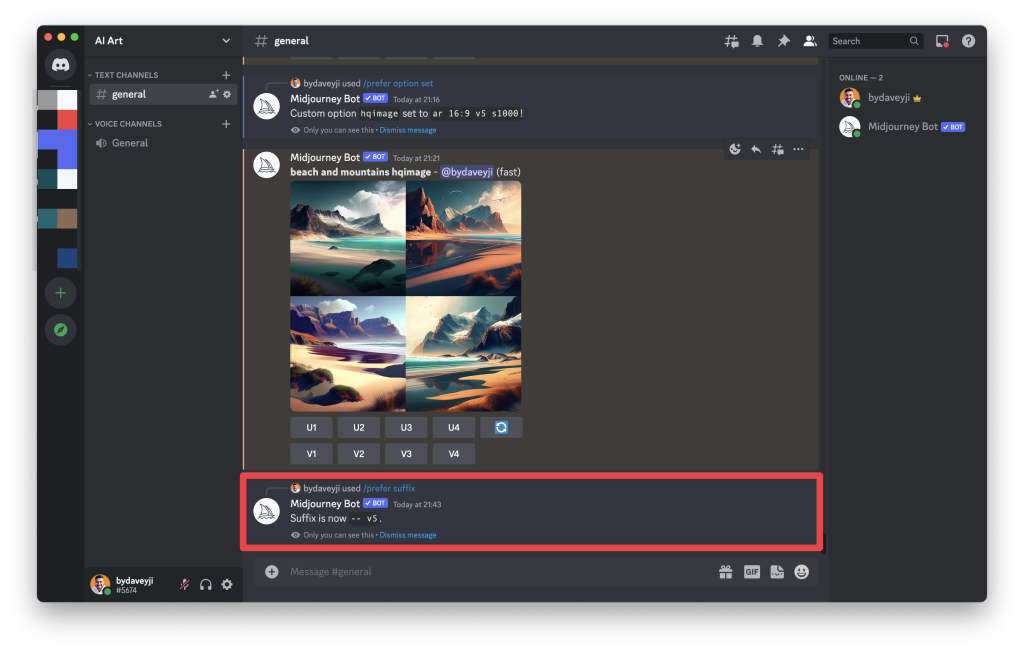
Step #2: Enter the trigger word. Use this word to trigger multiple parameters at once. In this example, we trigger ‘– ar 16:9 — v5 — s1000‘ by using just one word. Press the tab after you enter the custom option.
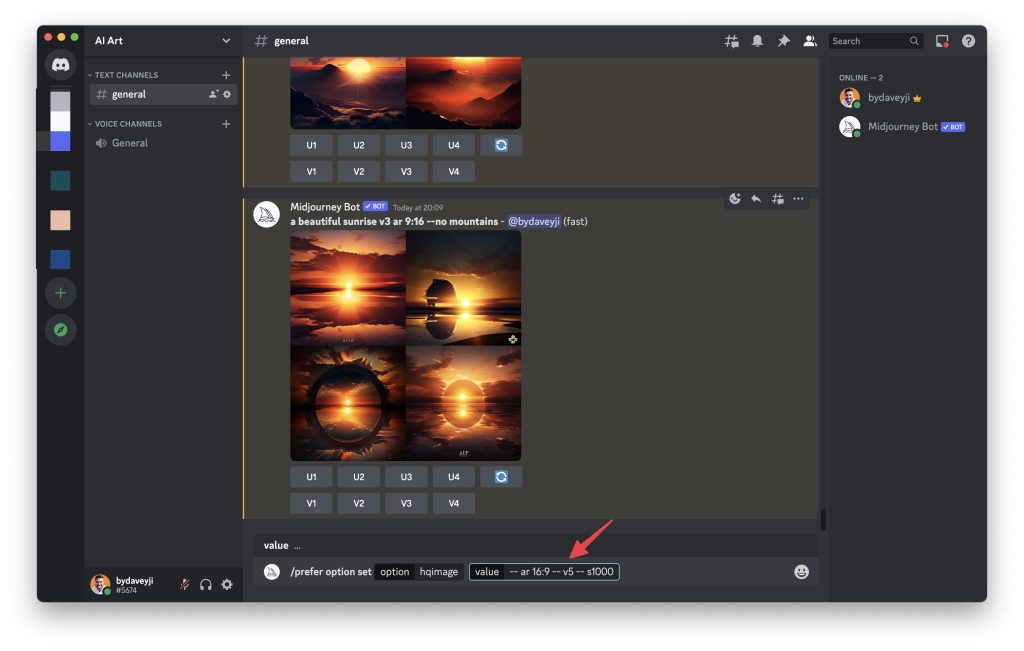
Step #3: Click on the Value shown above the text box to enter the values you want to add. After you enter the value for the shortcut, press enter/return to submit the values.
Step #4: You can see the confirmation message from the bot that your custom prompt is saved.
Step #5: Next time when you generate an image, you can use the shortcut you created in Step 2 in the prompt. After you submit, Midjourney Bot will translate the shortcut into the values you entered in Step 3. Make sure you add ‘–‘ before the shortcut as shown below.
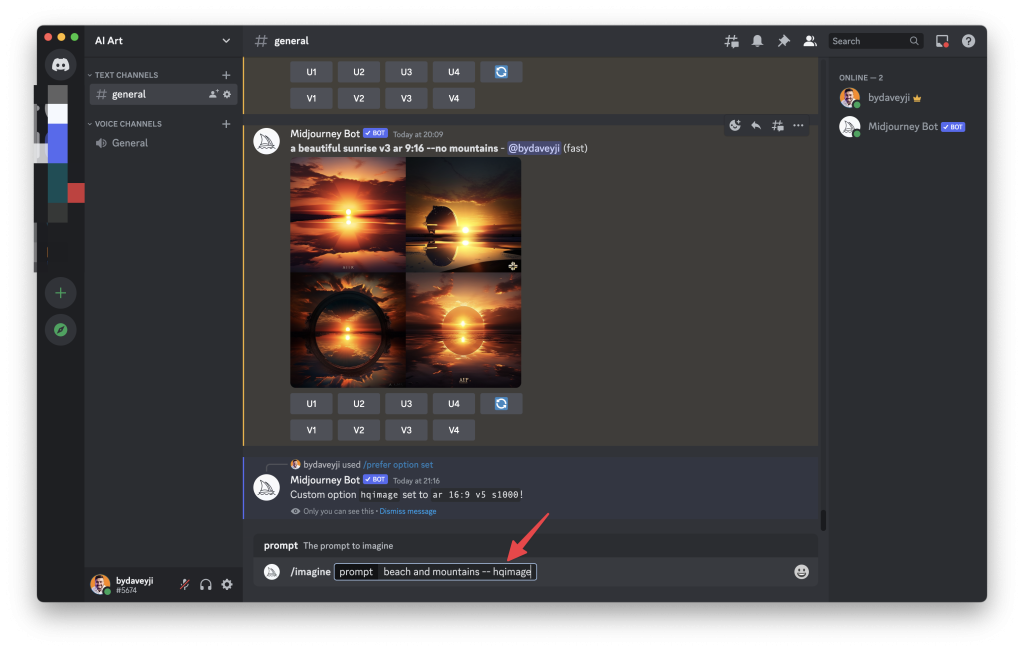
Step #6: Just like any other prompt, press ‘enter/return’ to submit the task for execution.

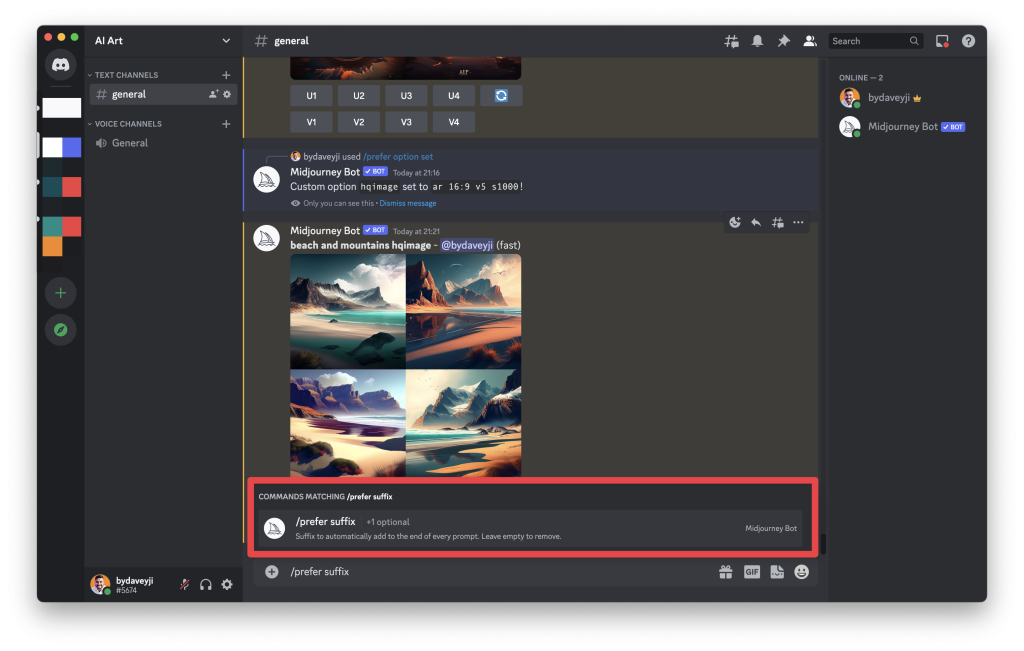
Adding Prefer Suffix in Midjourney AI
If you want to save some more time, you can instruct Midjourney AI to use certain prompts for all the tasks by default. Here’s how you can use the ‘Prefer Suffix’ prompt.
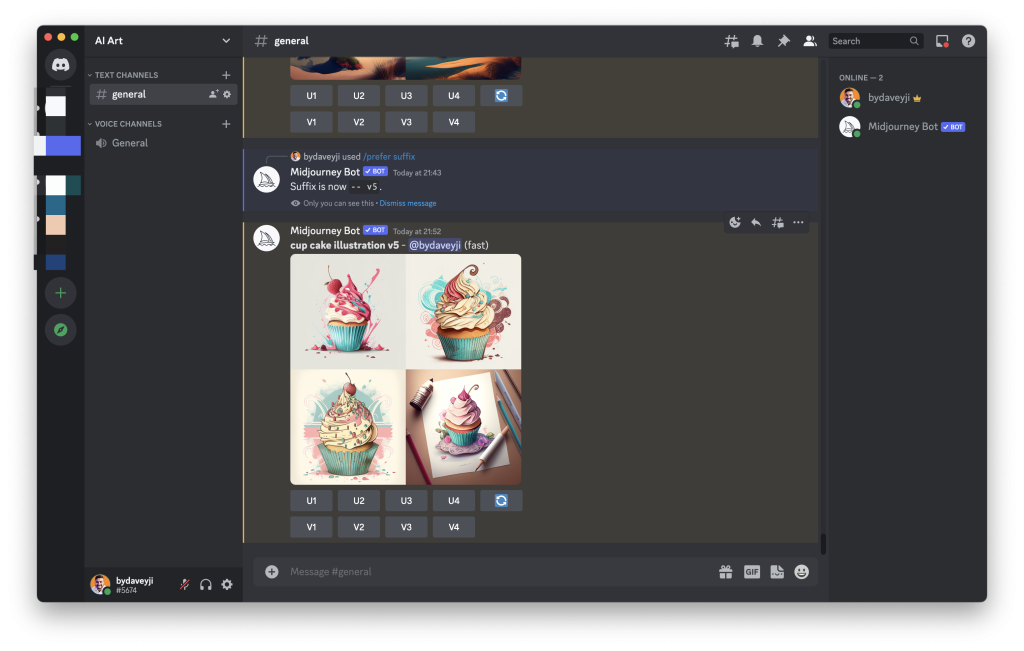
Step #1: In the chat window, type ‘/prefer suffix‘
Step #2: Enter the prompt that you want to be included in all prompts by default. I have added using version 5 of midjourney for all the prompts I use. Version 5 is the latest version & has improved output for all aspects of Generative AI.
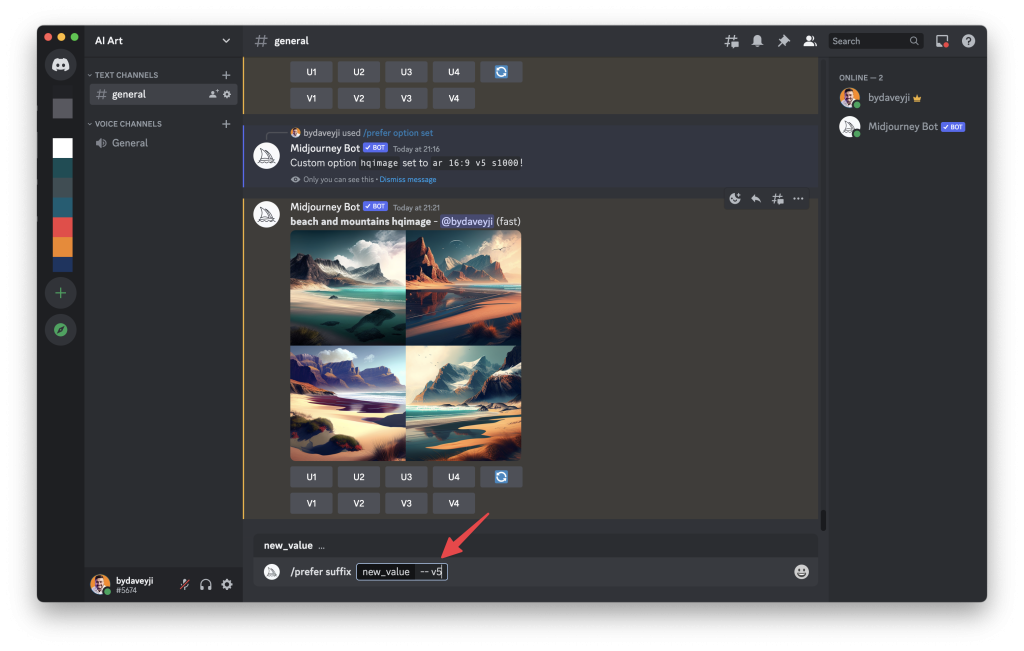
Step #3: Look for confirmation that your suffix has changed as shown below
Word weight on Midjourney AI
You can instruct Midjourney AI to put weight on certain parameters out of several parameters that you give into the prompt.
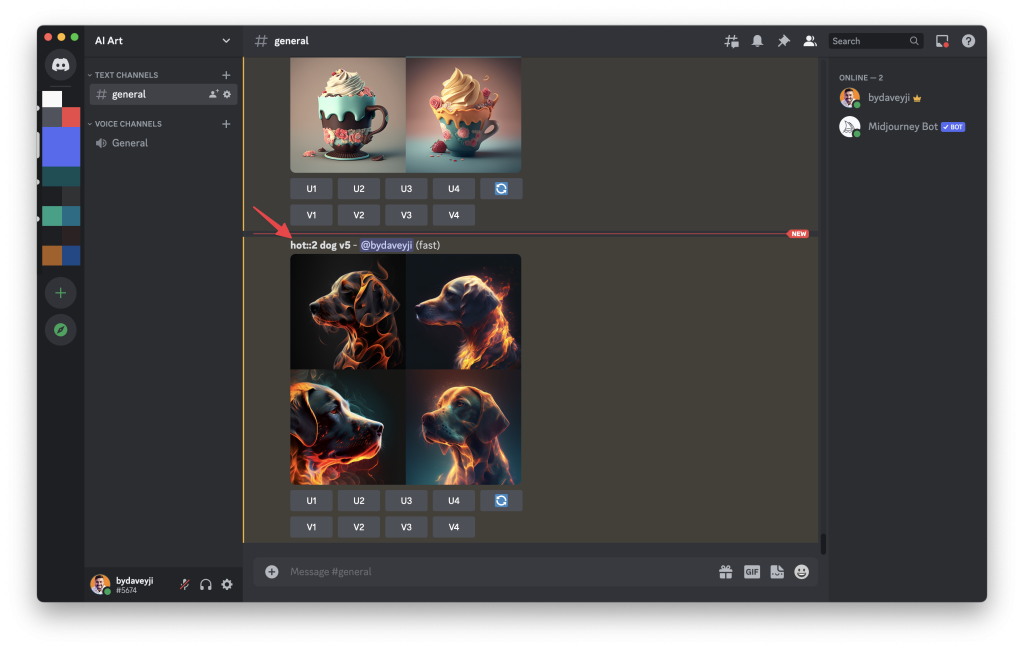
To use the word weight, put :: (double colon) after the parameters followed by the number. Let’s explore this with an example.
Output without word weight:
Output with word weight:
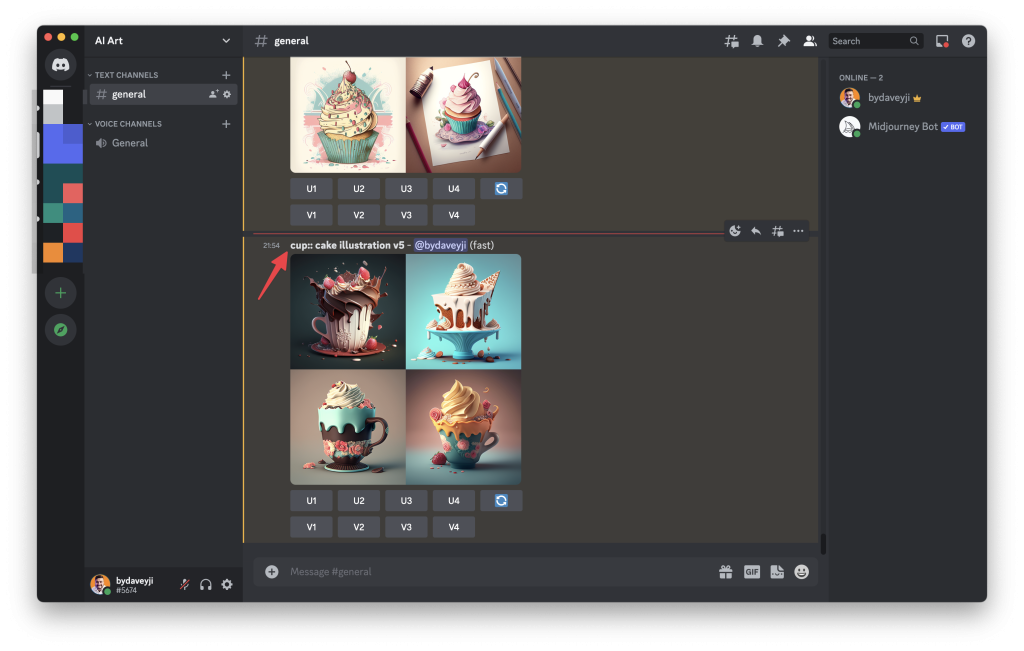
You can even set weight by adding numbers to the prompts. Depending on the number of parameters numbers will vary.
Keywords/Parameters you should know before using Midjourney AI
While Midjourney AI has several prompts to work with, here are some prompts you should use:
- –Chaos: The score instructs Midjourney AI to create varied results. The higher the number, varied the results
- Hyper realistic, portrait photography, <DSLR maker> <focal length> <f stopr>
- Include style/genre name to generate specific styled images. Like ‘James Bond style‘
- Use artists’ names to mimic their styles in your renders. Check out these images in Da Vinci style & Andy Warhol style.
Inspiration prompts to create breathtaking images with Midjourney AI
The best way to learn the art of prompts is to learn from the community. Go to Midjourney community to check out the images and the prompts used to generate such images.
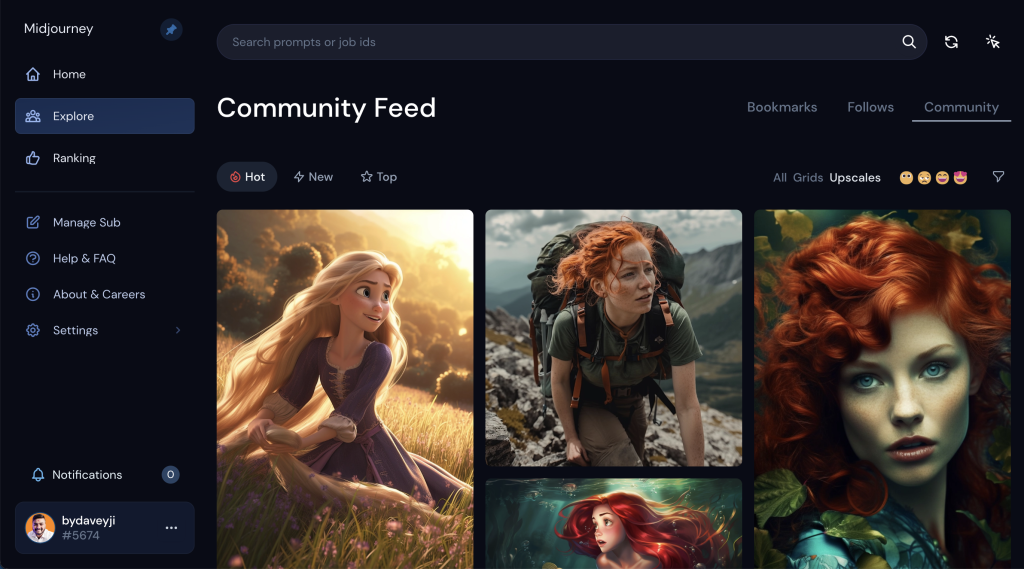
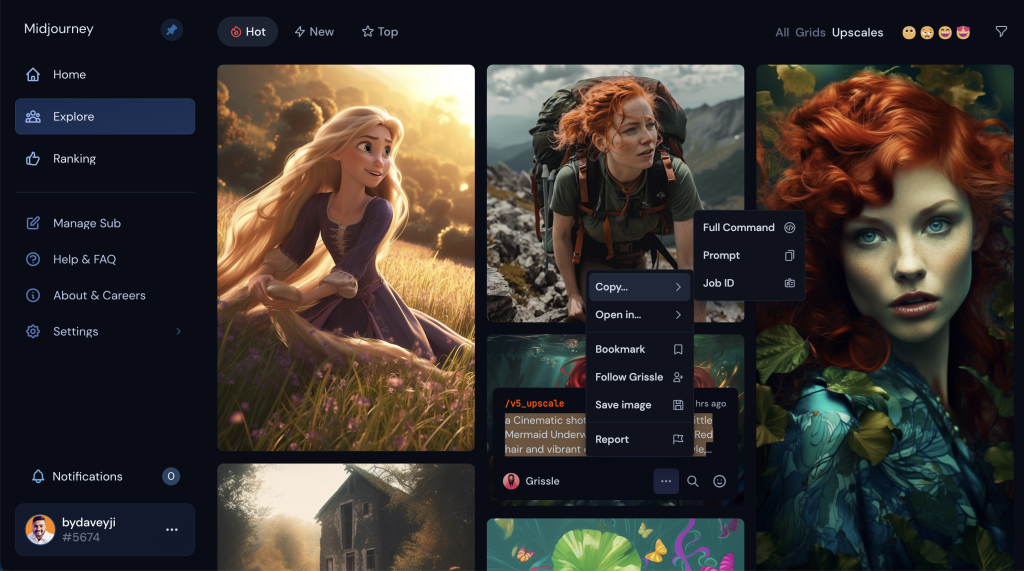
If you find an image that’s interesting, you can click on the three dots in the bottom right to copy the prompt or Full command.
Edit your images using Midjourney AI
You can create your own magical avatar using Midjourney AI. Simply upload your images to Midjourney AI Bot.
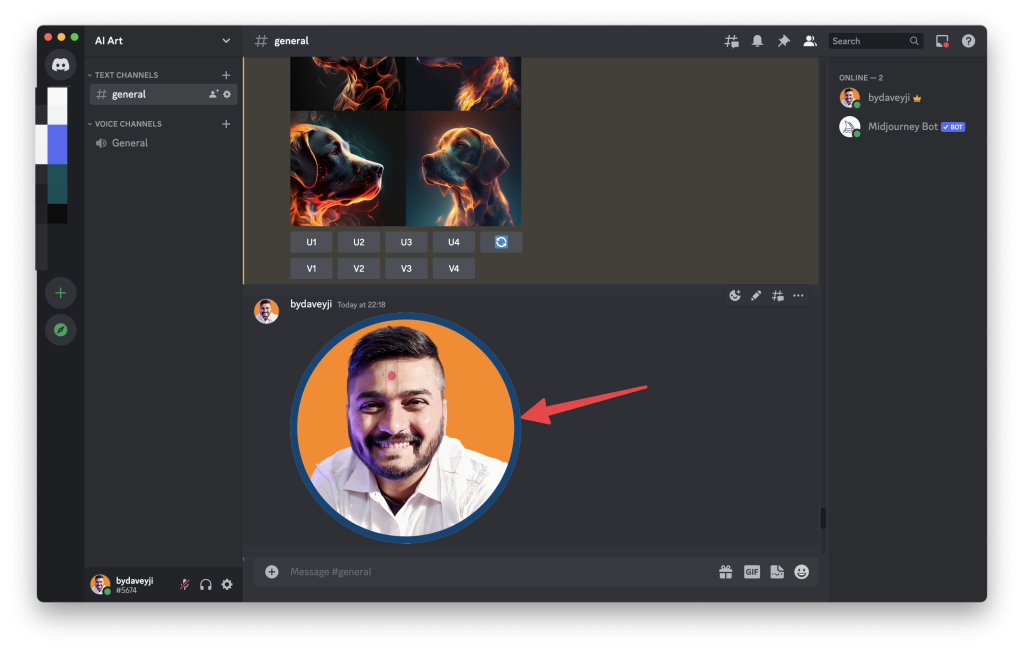
Copy the link of the image, trigger the ‘/imagine’ prompt, paste the link, and unleash your creativity.
Frequently asked questions
Is Midjourney AI free?
You can start for free. You can generate 25 images per month. You can access the community but can’t search for specific images. Also, can’t copy the full command of the images you find interesting.
How to use midjourney AI?
Midjourney uses Discord to interact with users. Discord is a free platform to engage with communities. Create an account on Discord and then create an account on midjourney to start using.
Can anyone use Midjourney AI?
Anyone can signup for midjourney & discord with valid email addresses.
How much does Midjourney AI cost?
Midjourney AI has free plans & paid plans. The paid plans begin at $10/mo.
How do I start creating on Midjourney?
Create an account on Discord (if not already created), go to the midjourney homepage & apply to get an invitation link to join the Discord server.
How do I use Midjourney AI?
Midjourney is an AI image generation tool that takes texts as input and generates images based on that. Better the input, the better the output.
How do I get the best results from Midjourney?
Midjourney is really good at understanding the minute details you provide in the prompts. You can get the best results from Midjourney by mentioning the details of the lights (Cinematic) and camera/lens (Sony Alpha A7).
Can I sell Midjourney art?
If you’re using a free account, you aren’t allowed to make money off the images under the free plan. Furthermore, you have to mention the credits wherever required. If you’re having a paid account, you can use the images however you want.
Are there any free AI art generators?
Apart from midjourney, there are several midjourney alternatives. The best one is Lexica.art & canva’s text-to-image generator (only for Pro subscribers)
Comments